Upload and create your own shapes
Requirements for individual shapes for integration with DREAMCOMPOSER®
For seamless integration with DREAMCOMPOSER®, adhere to these guidelines:
- File Formats: Export your 3D objects from Blender in GLTF or GLB formats.
- Size Limits: Maintain file sizes below 100 MB, with no more than 100,000 vertices and 50,000 faces.
- UV Meshes: Create a UV mesh for each part of your 3D object that requires a texture.
- Materials: Utilize PBR (Physically-Based Rendering) materials to achieve realism. For instance, employ a glass material for a glass bottle.
Detailed Step-by-Step Instructions
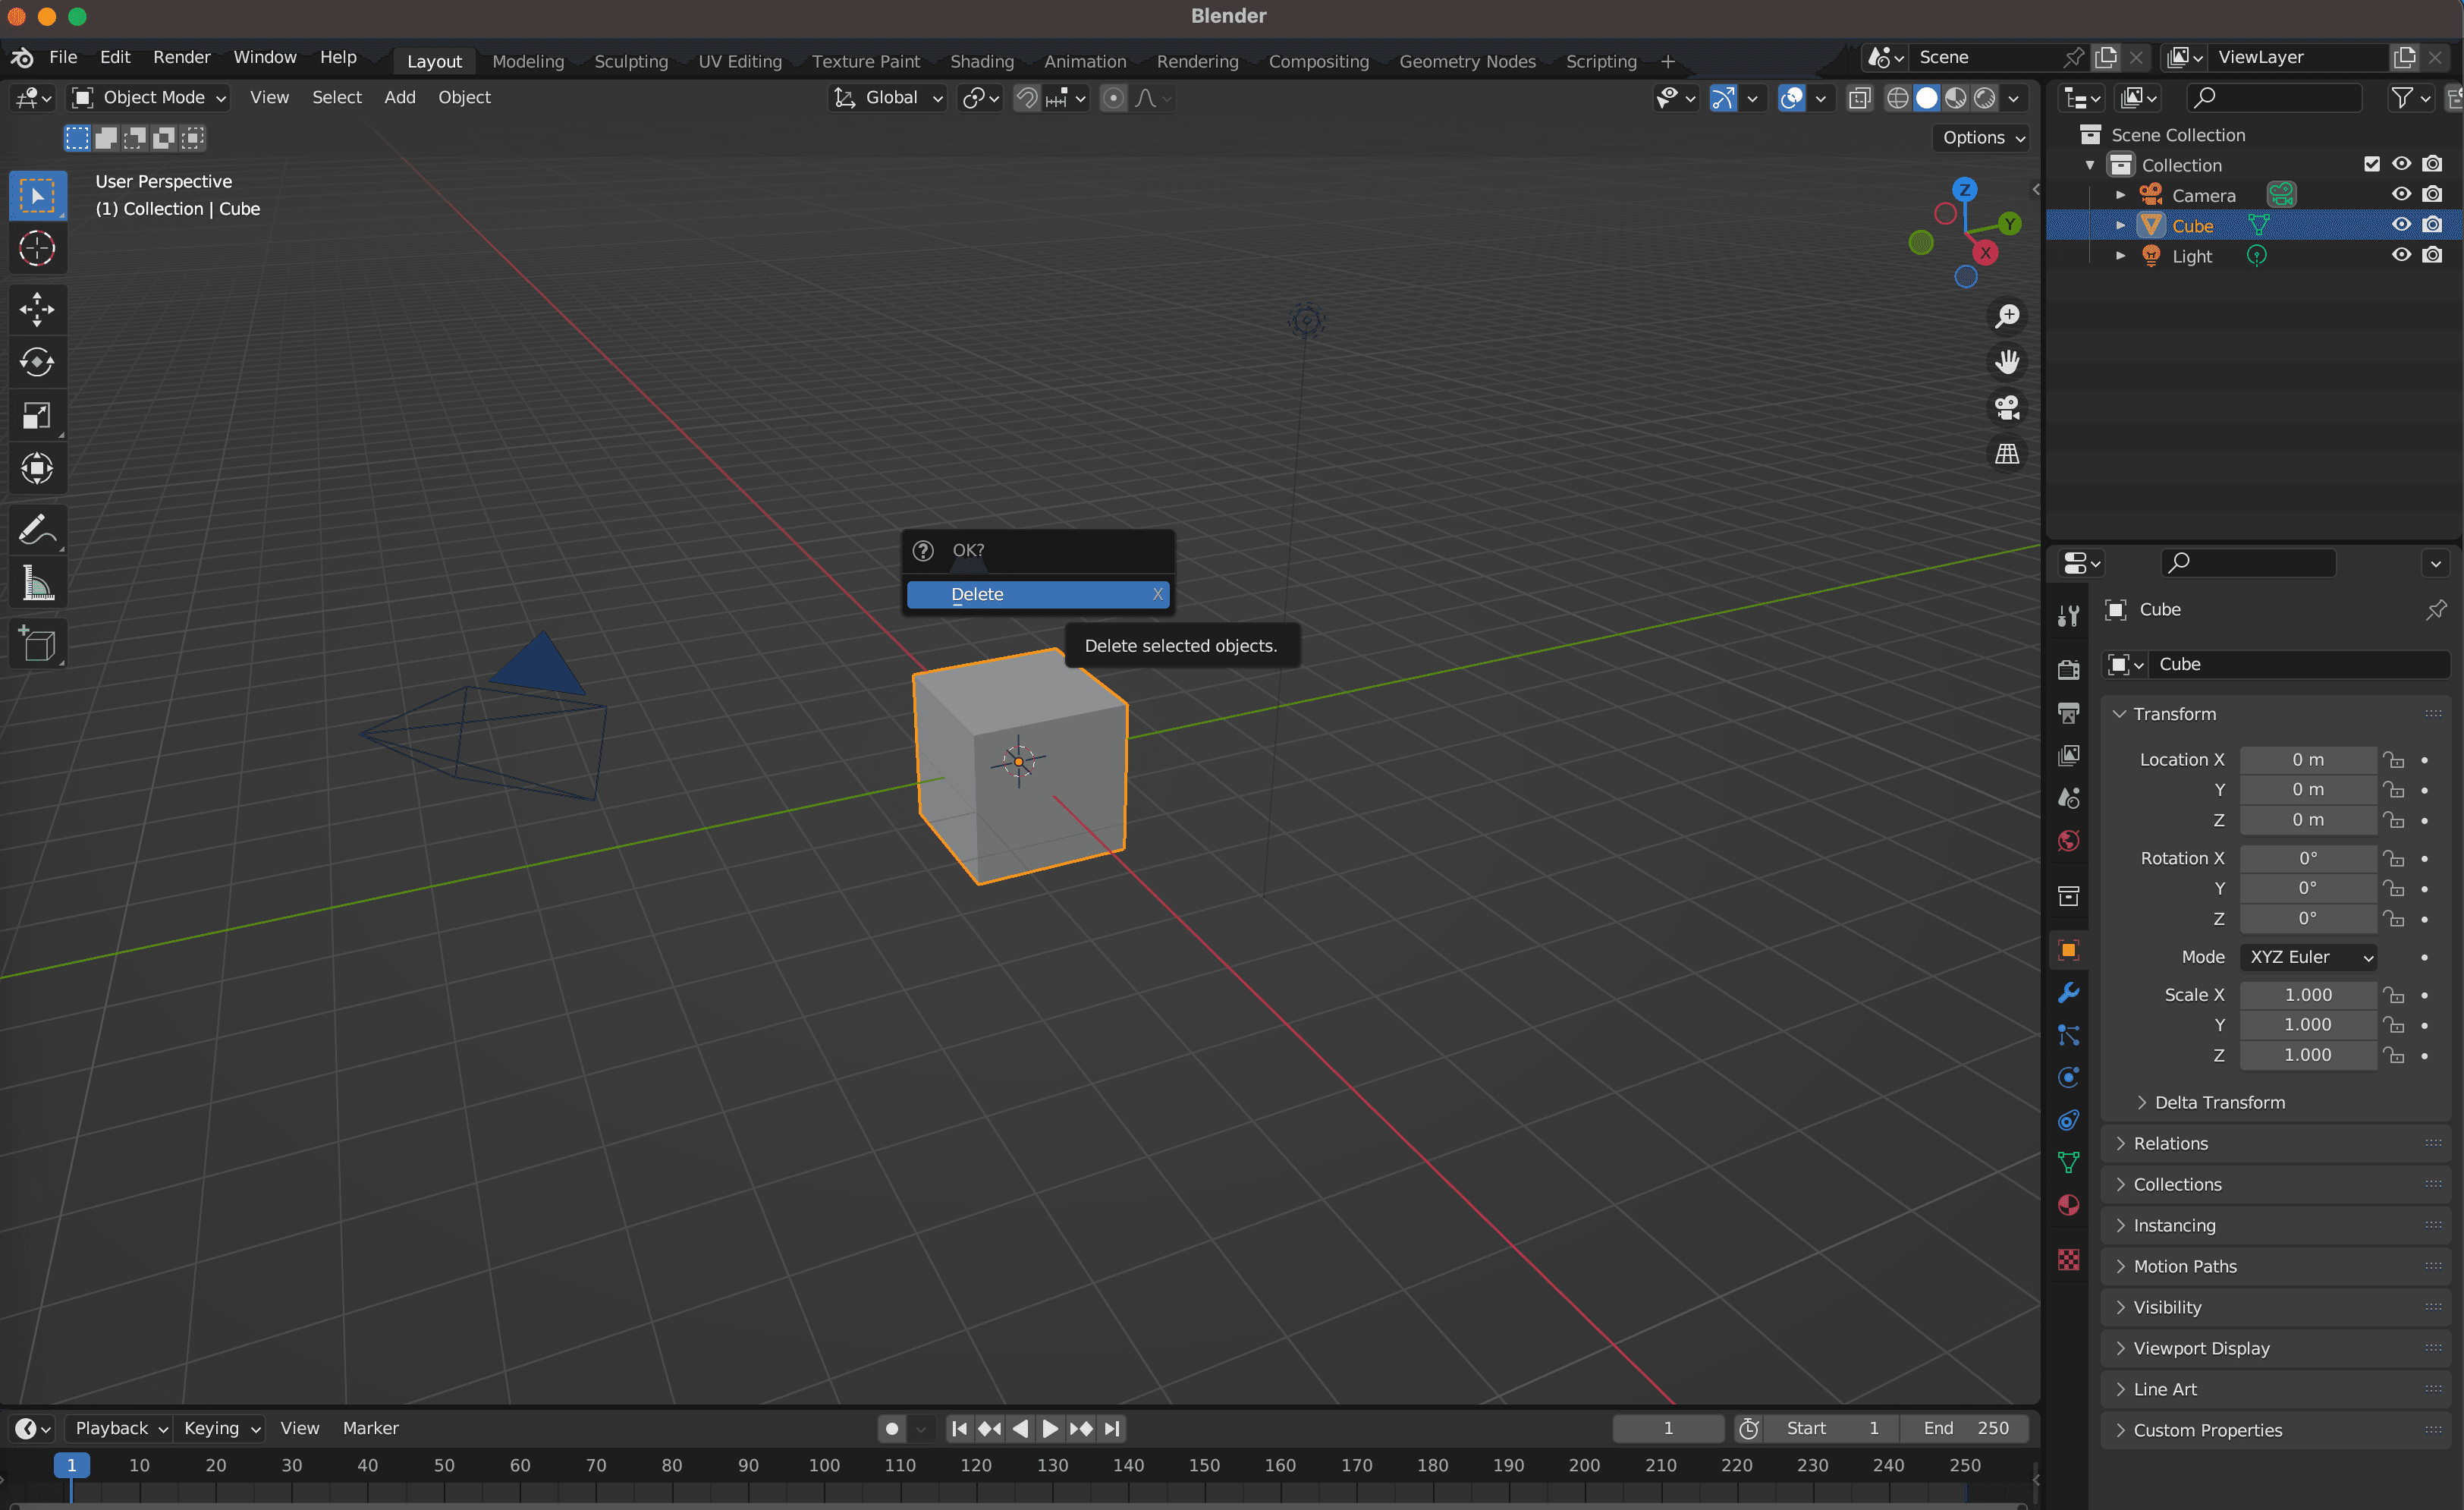
1. Launch Blender and Begin a New Project
- Open Blender.
- Start a new project.
- Delete the default cube by selecting it and pressing X and Enter.
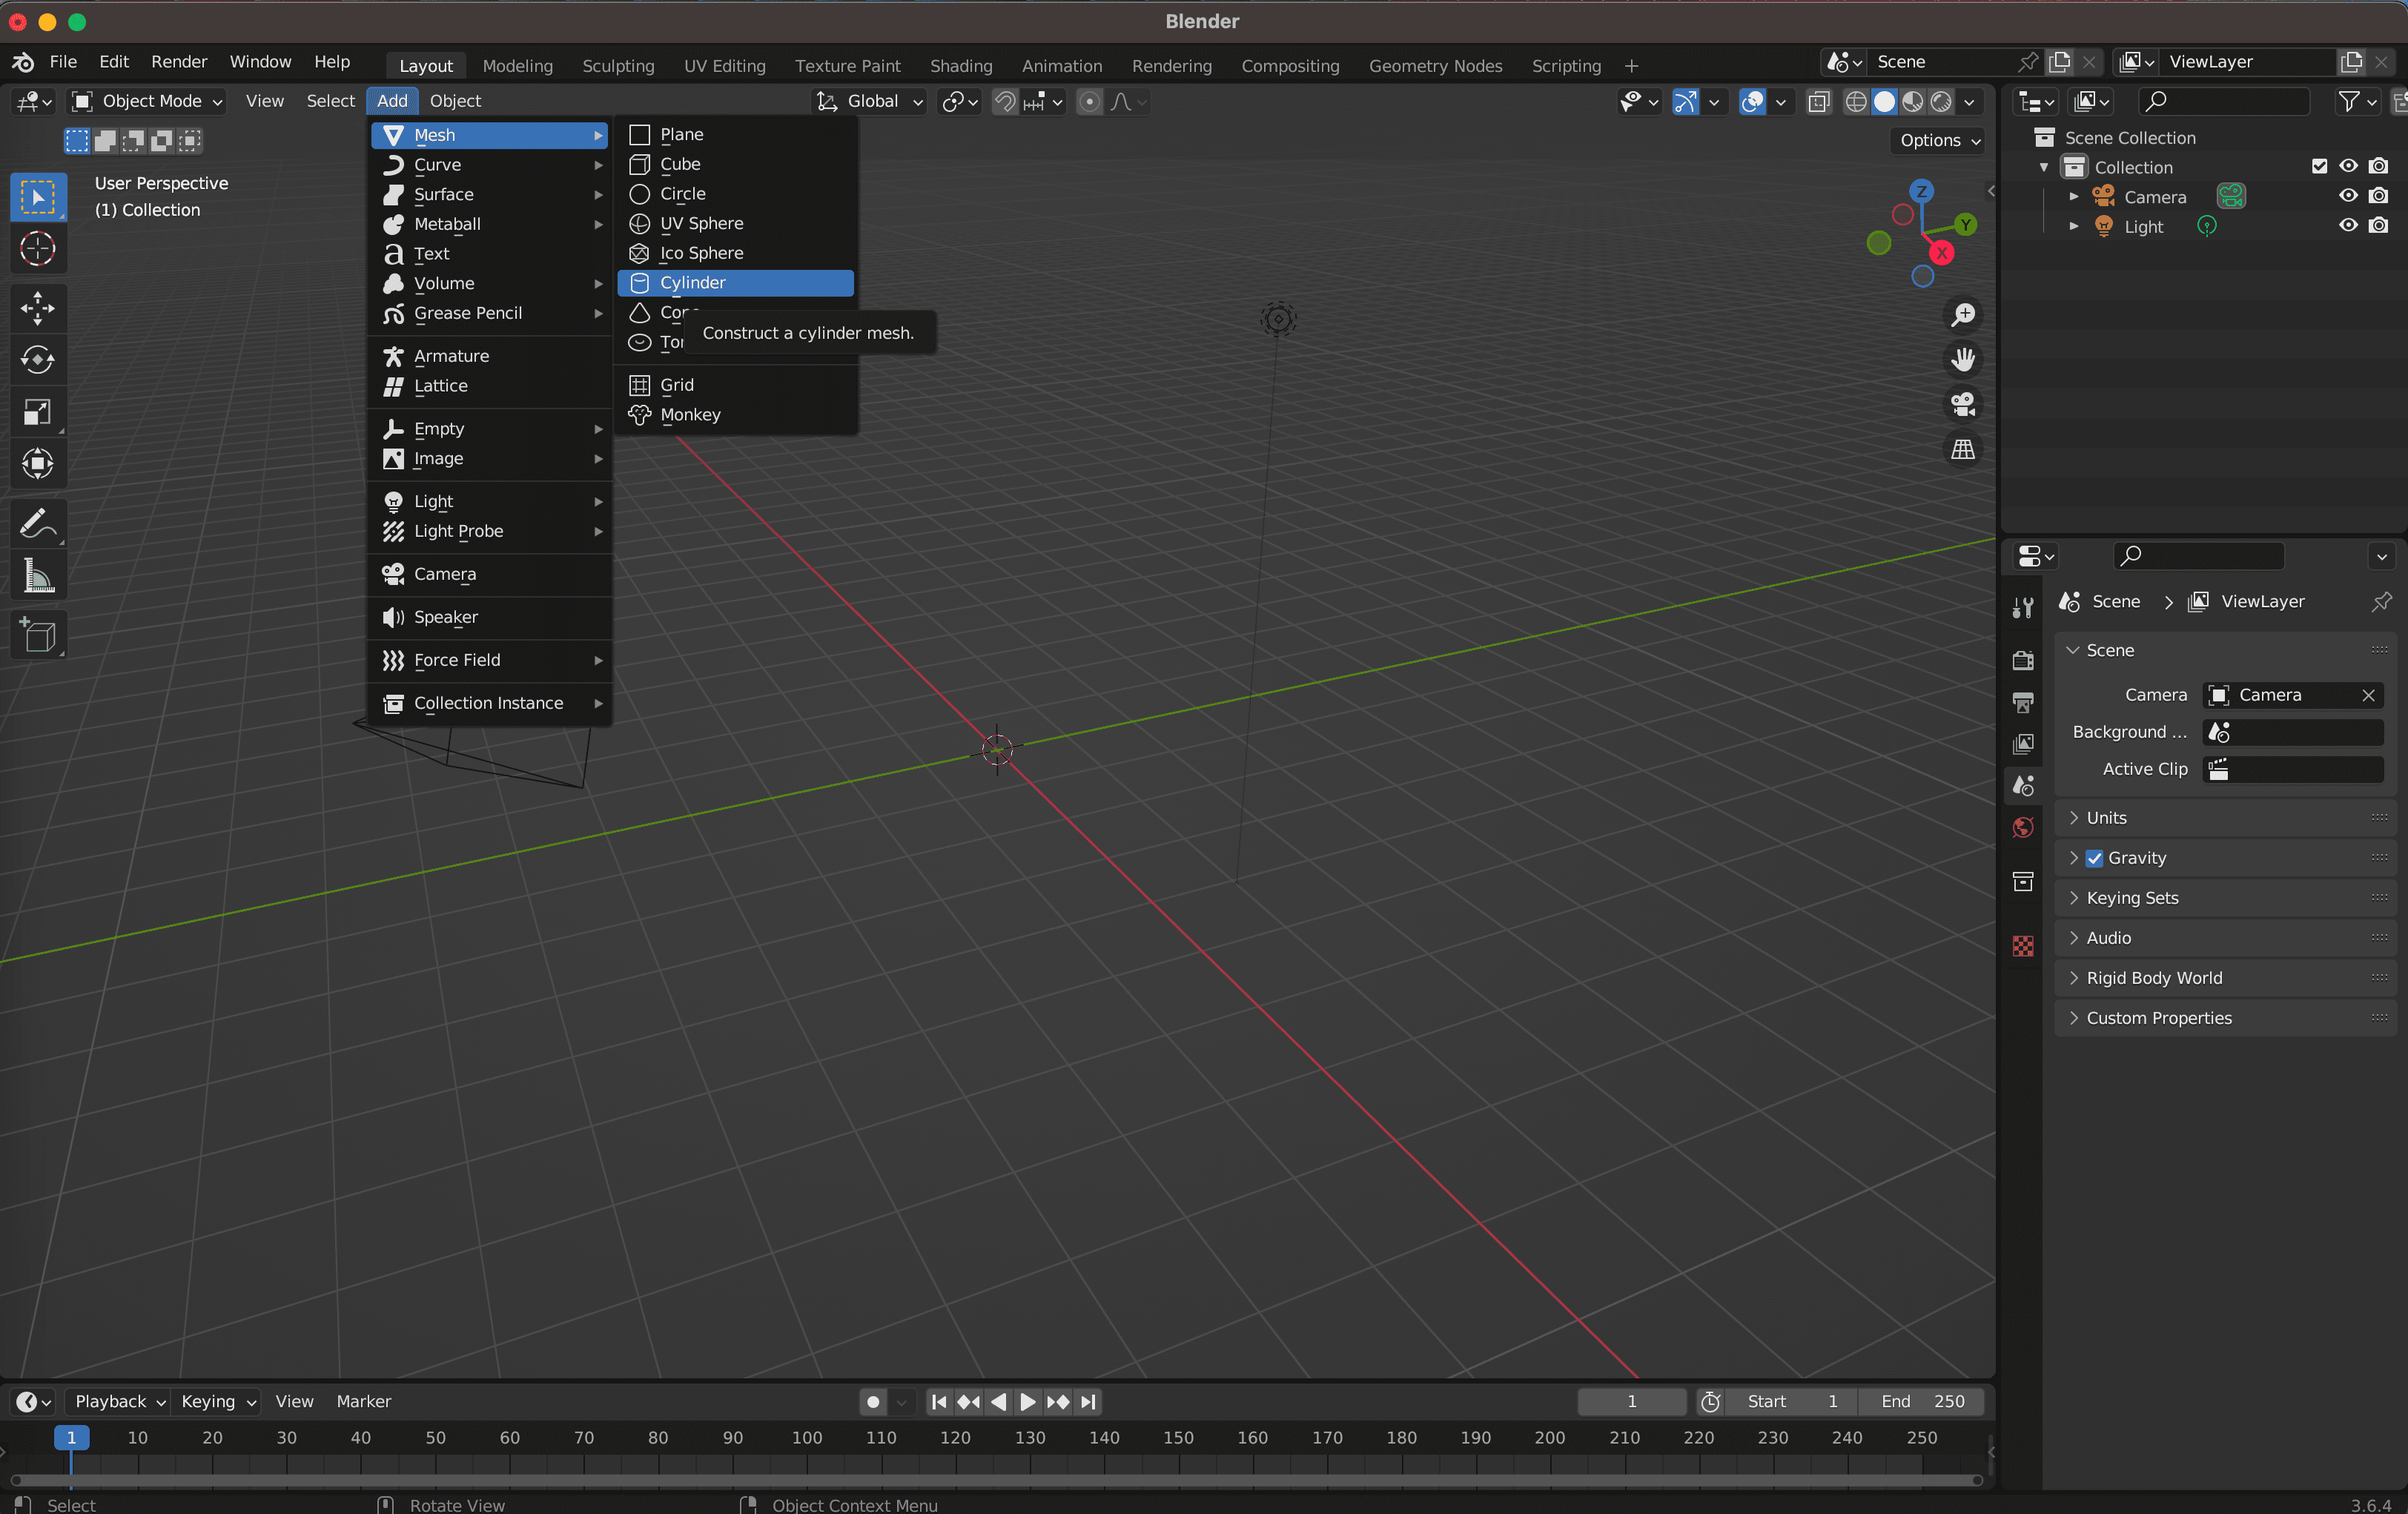
2. Add a New 3D Object
- In Blender's interface, select "Add" from the menu.
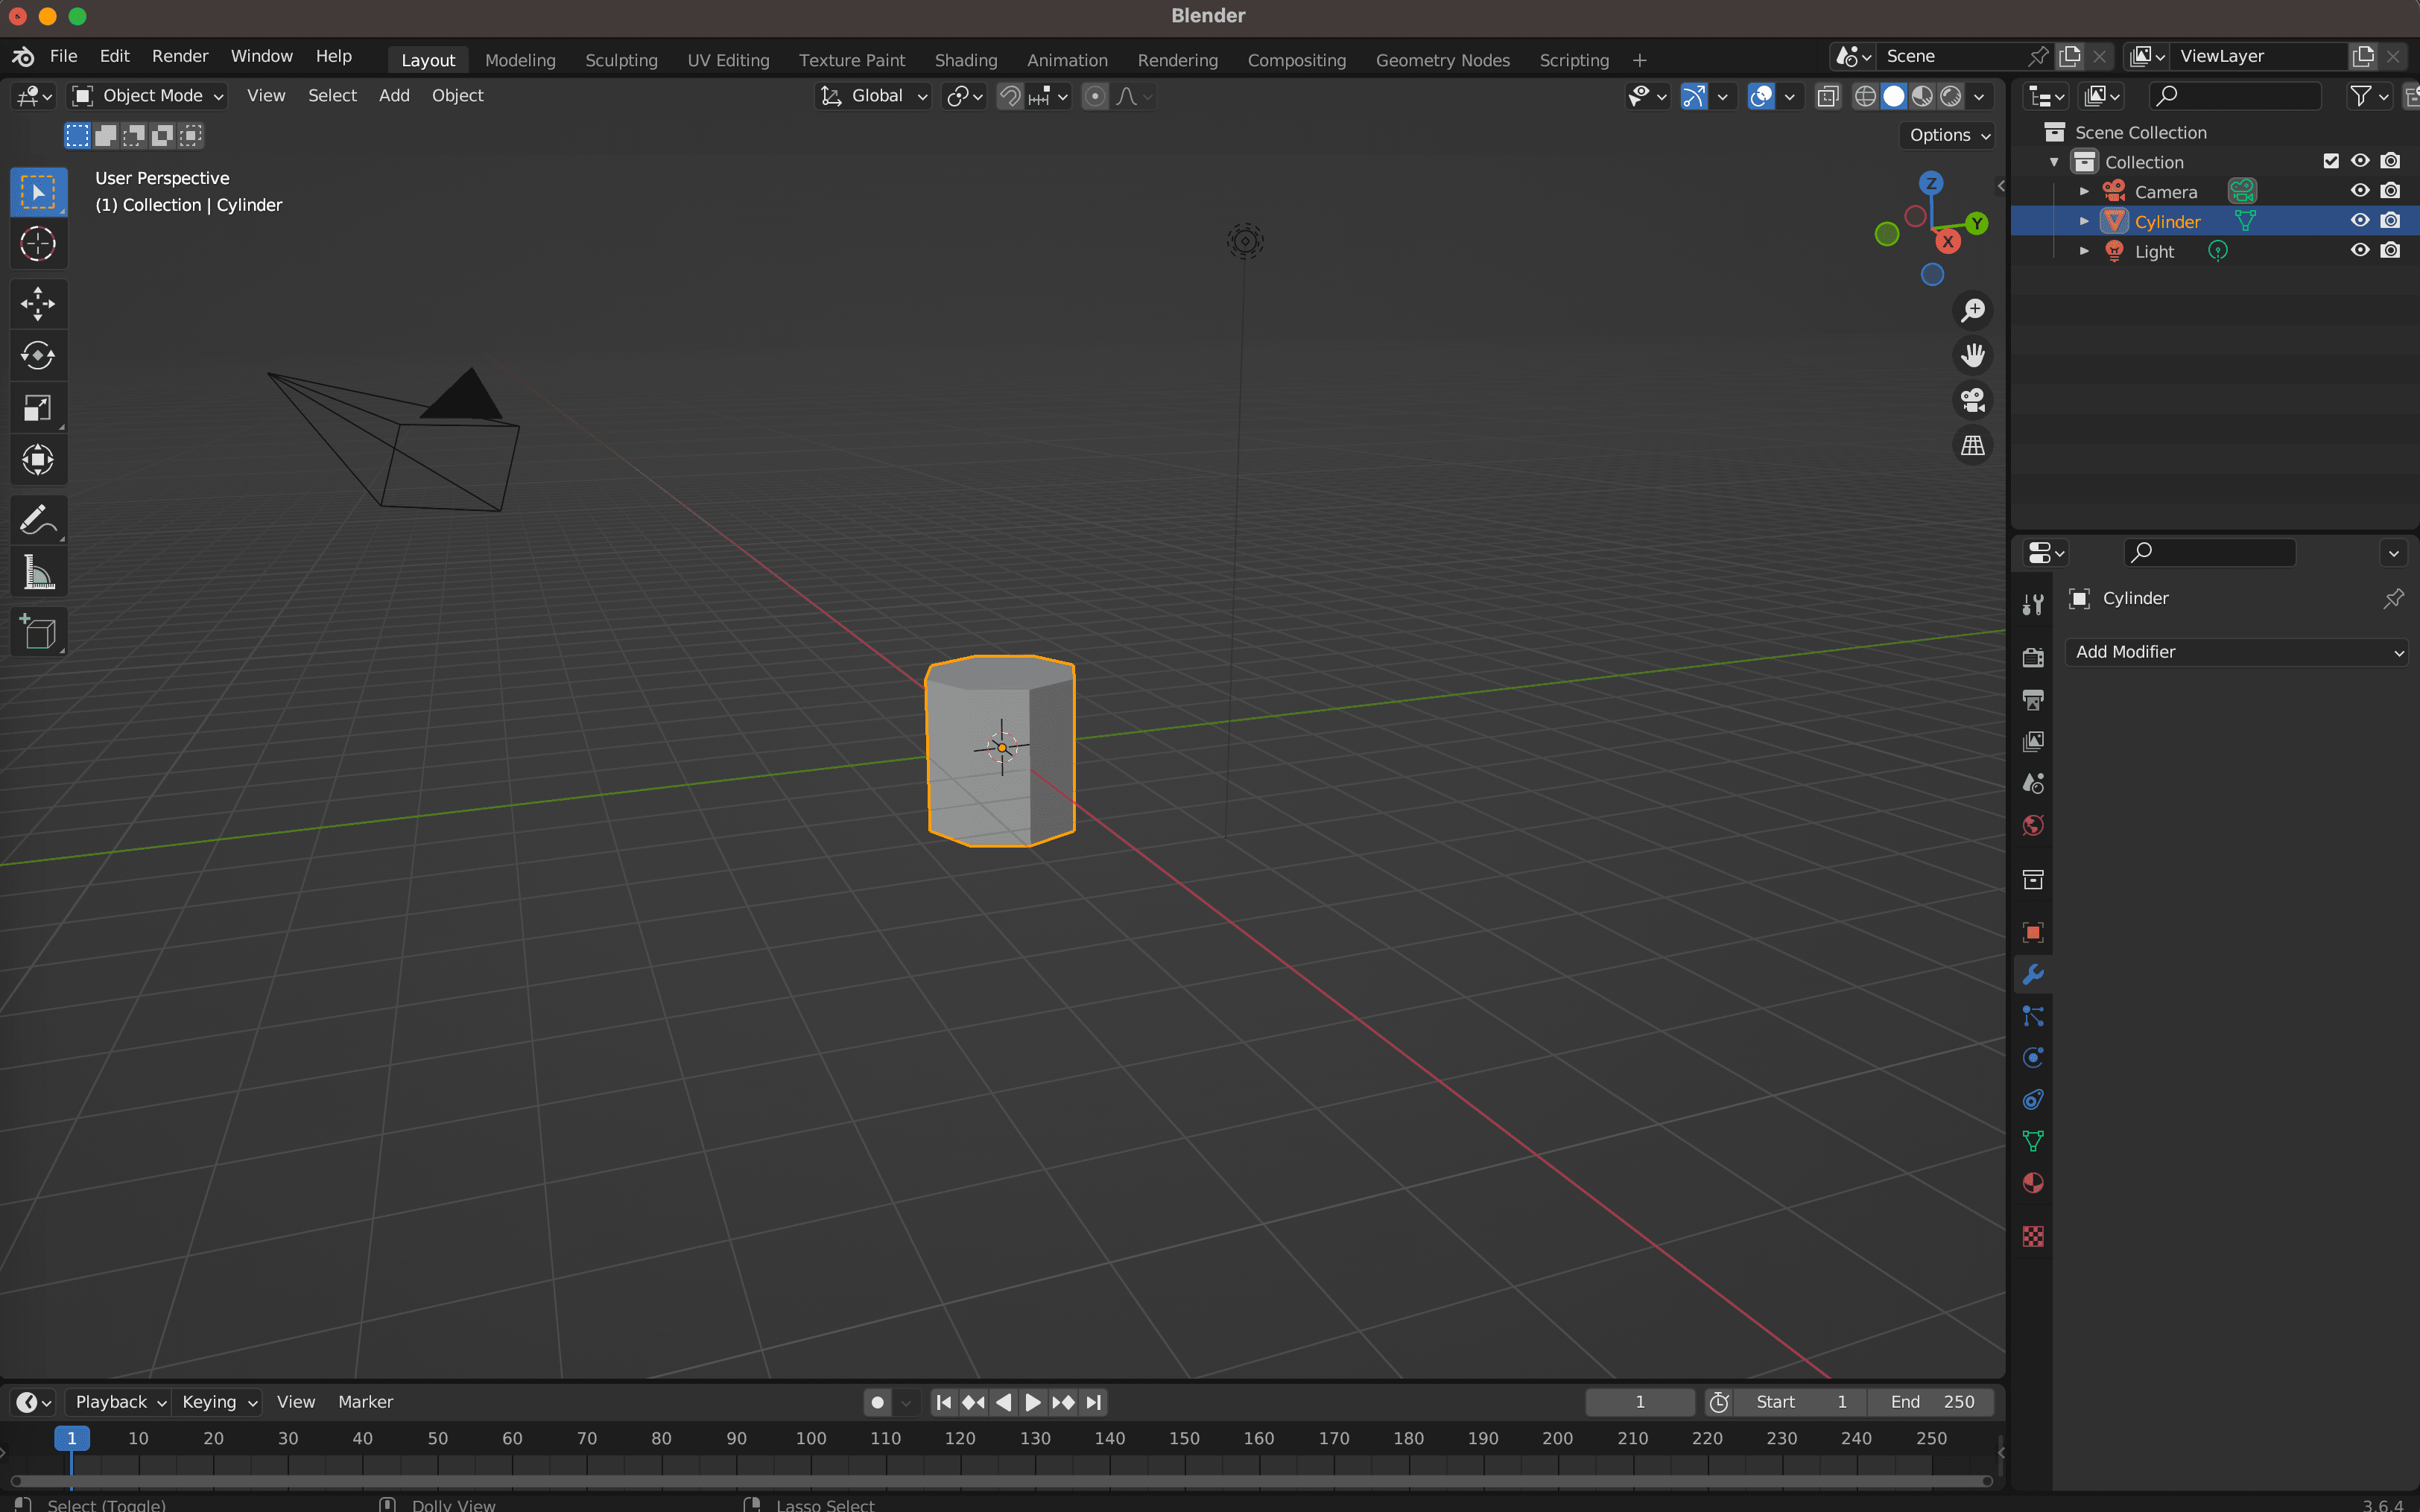
- Choose "Mesh" and then select the desired shape (e.g., "Cylinder" for a bottle).
- A cylinder will appear in the 3D viewport.
3. Manipulate the Object
- Adjust the object's position, rotation, and scale using the following controls:
- Press "G" to grab and move the object.
- Use "R" to rotate it.
- Scale it with "S".
- You can also use the "X," "Y," and "Z" keys to constrain the movement, rotation, or scaling along specific axes.
- Switch between different views of the 3D viewport using the number keys (1-9) to get front, side, top, and other perspectives.
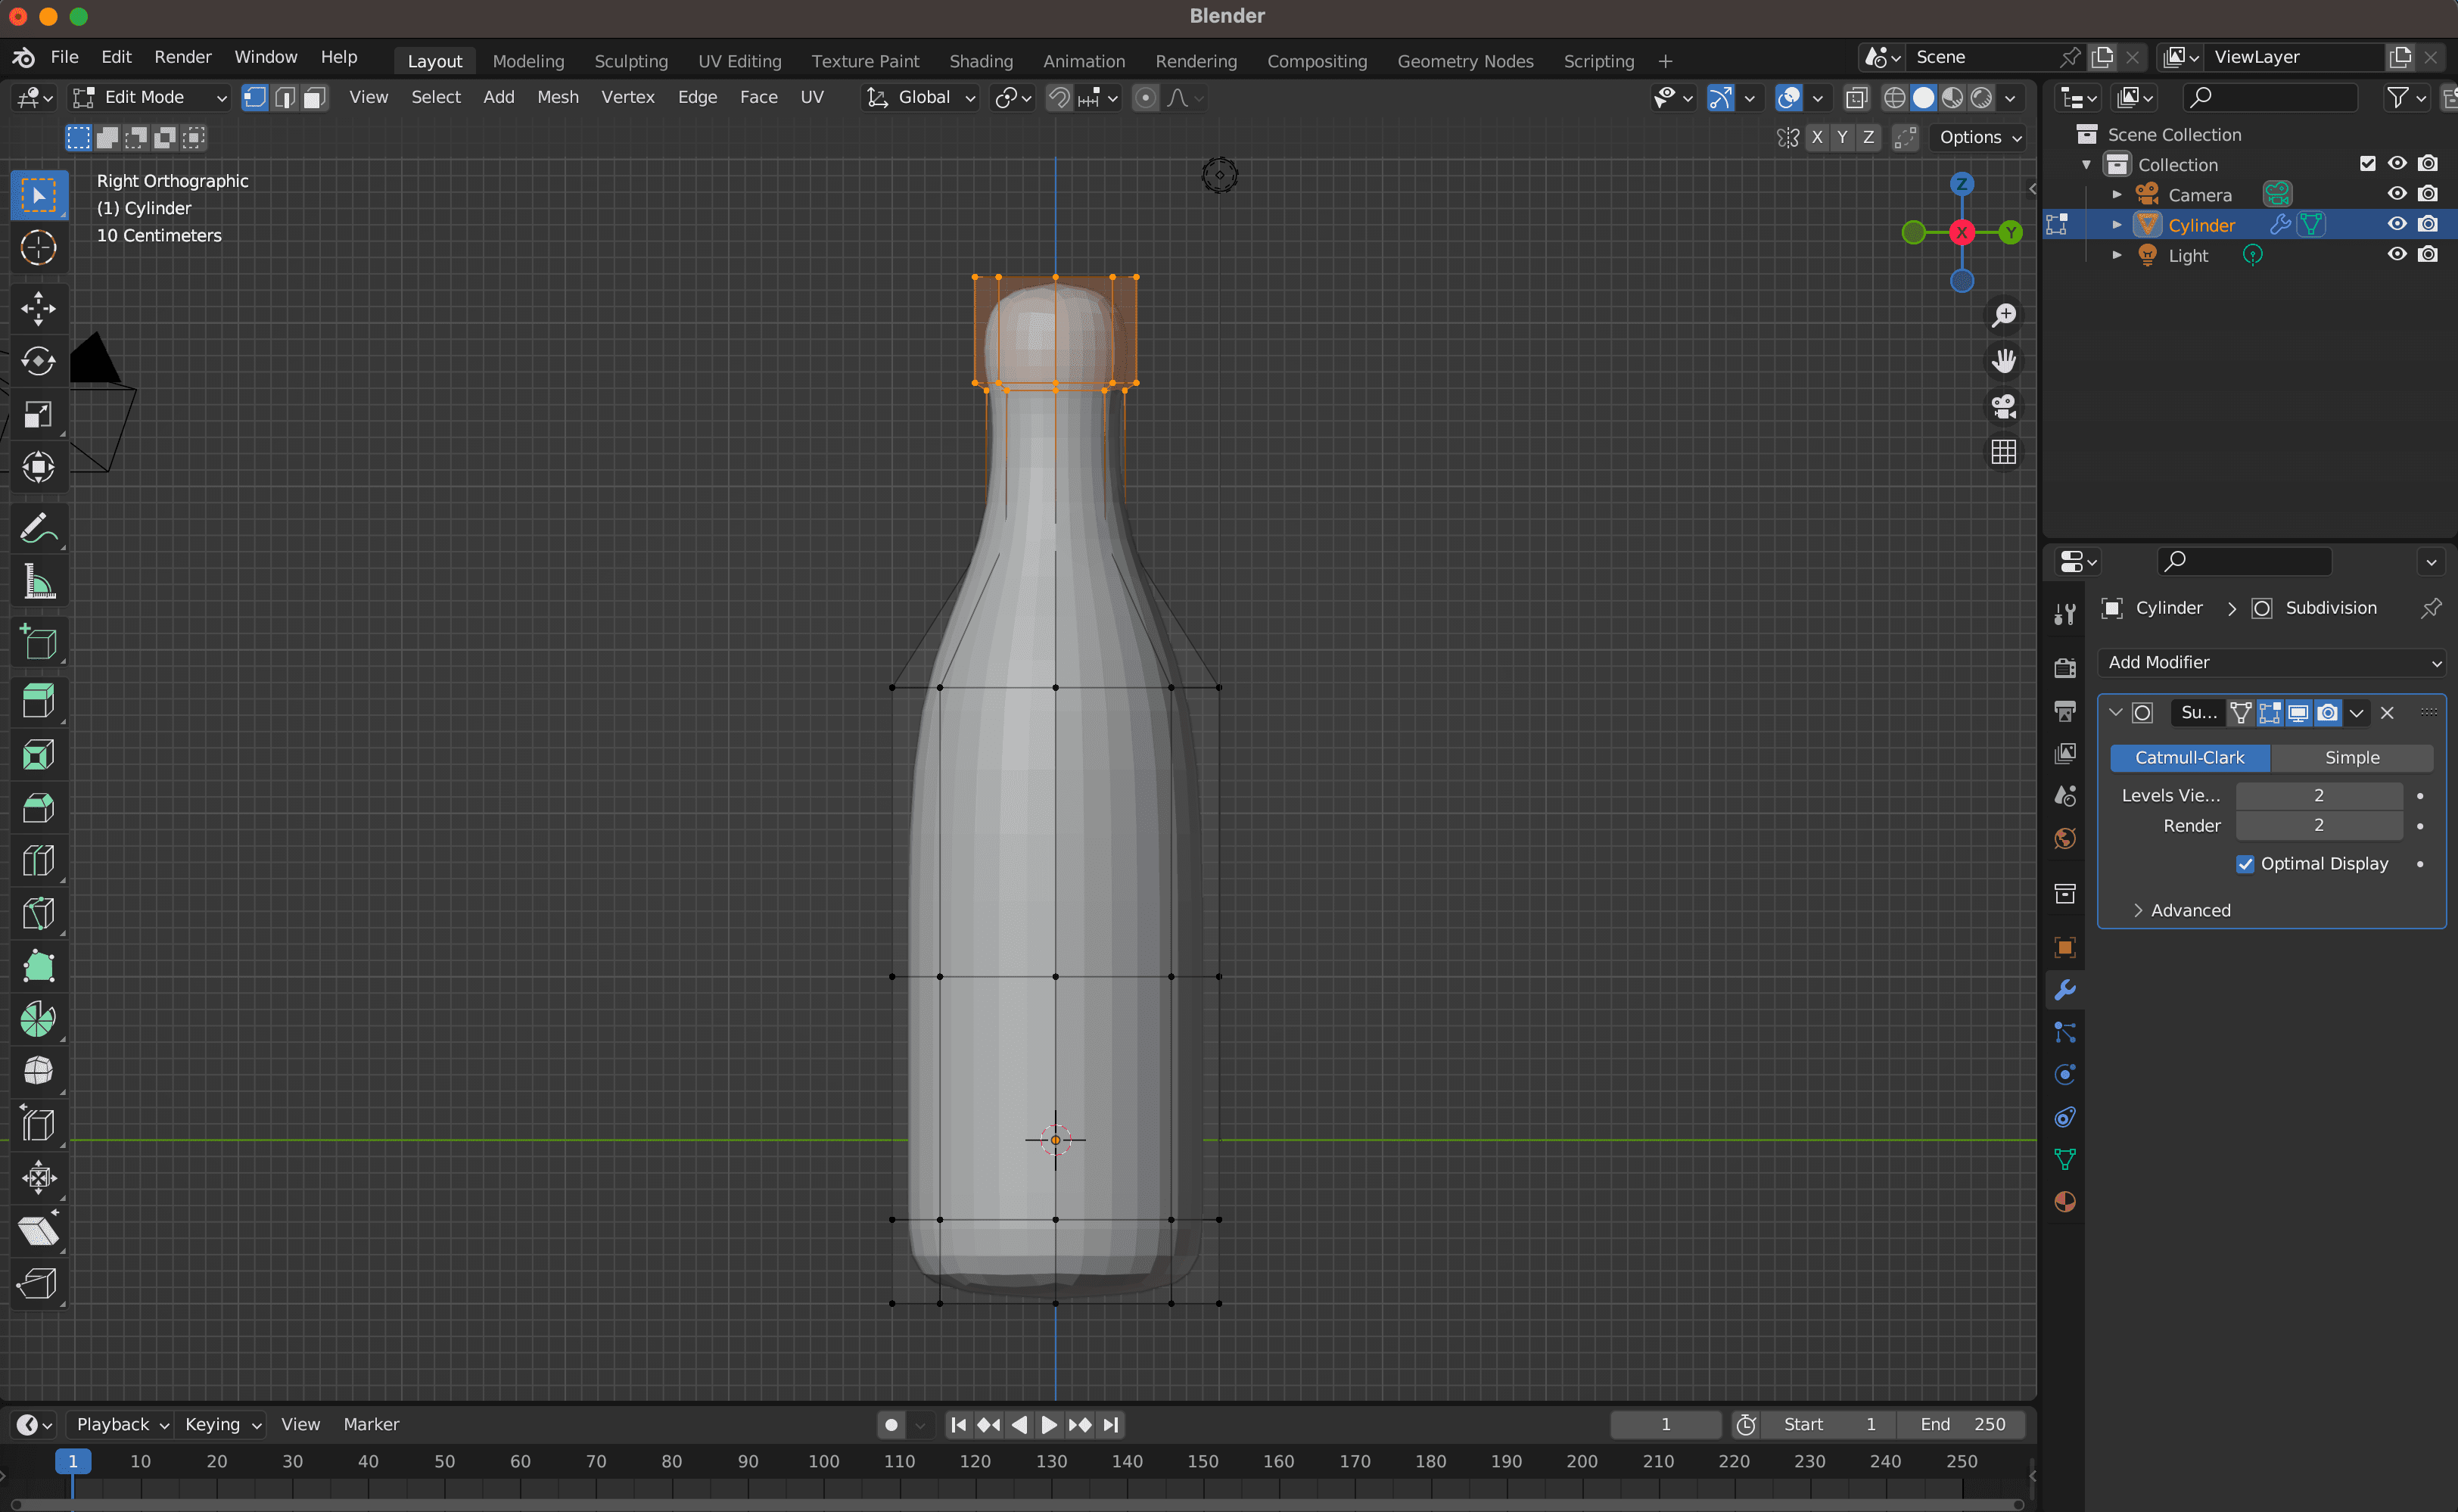
4. Customize the Object's Shape
- To edit the object's shape, enter "Edit Mode" by pressing "Tab."
- Select and manipulate its vertices, edges, or faces. Use shortcuts such as "A," "B," or "C" to select elements and "E" or "I" to extrude or inset faces.
- To create a bottle shape from the cylinder, consider actions like scaling down the top face to form a neck, extruding the top face to create a cap, insetting the bottom face to make a hole, and using "Loop Cut" (Ctrl+R) or "Bevel" (Ctrl+B) to refine edges.
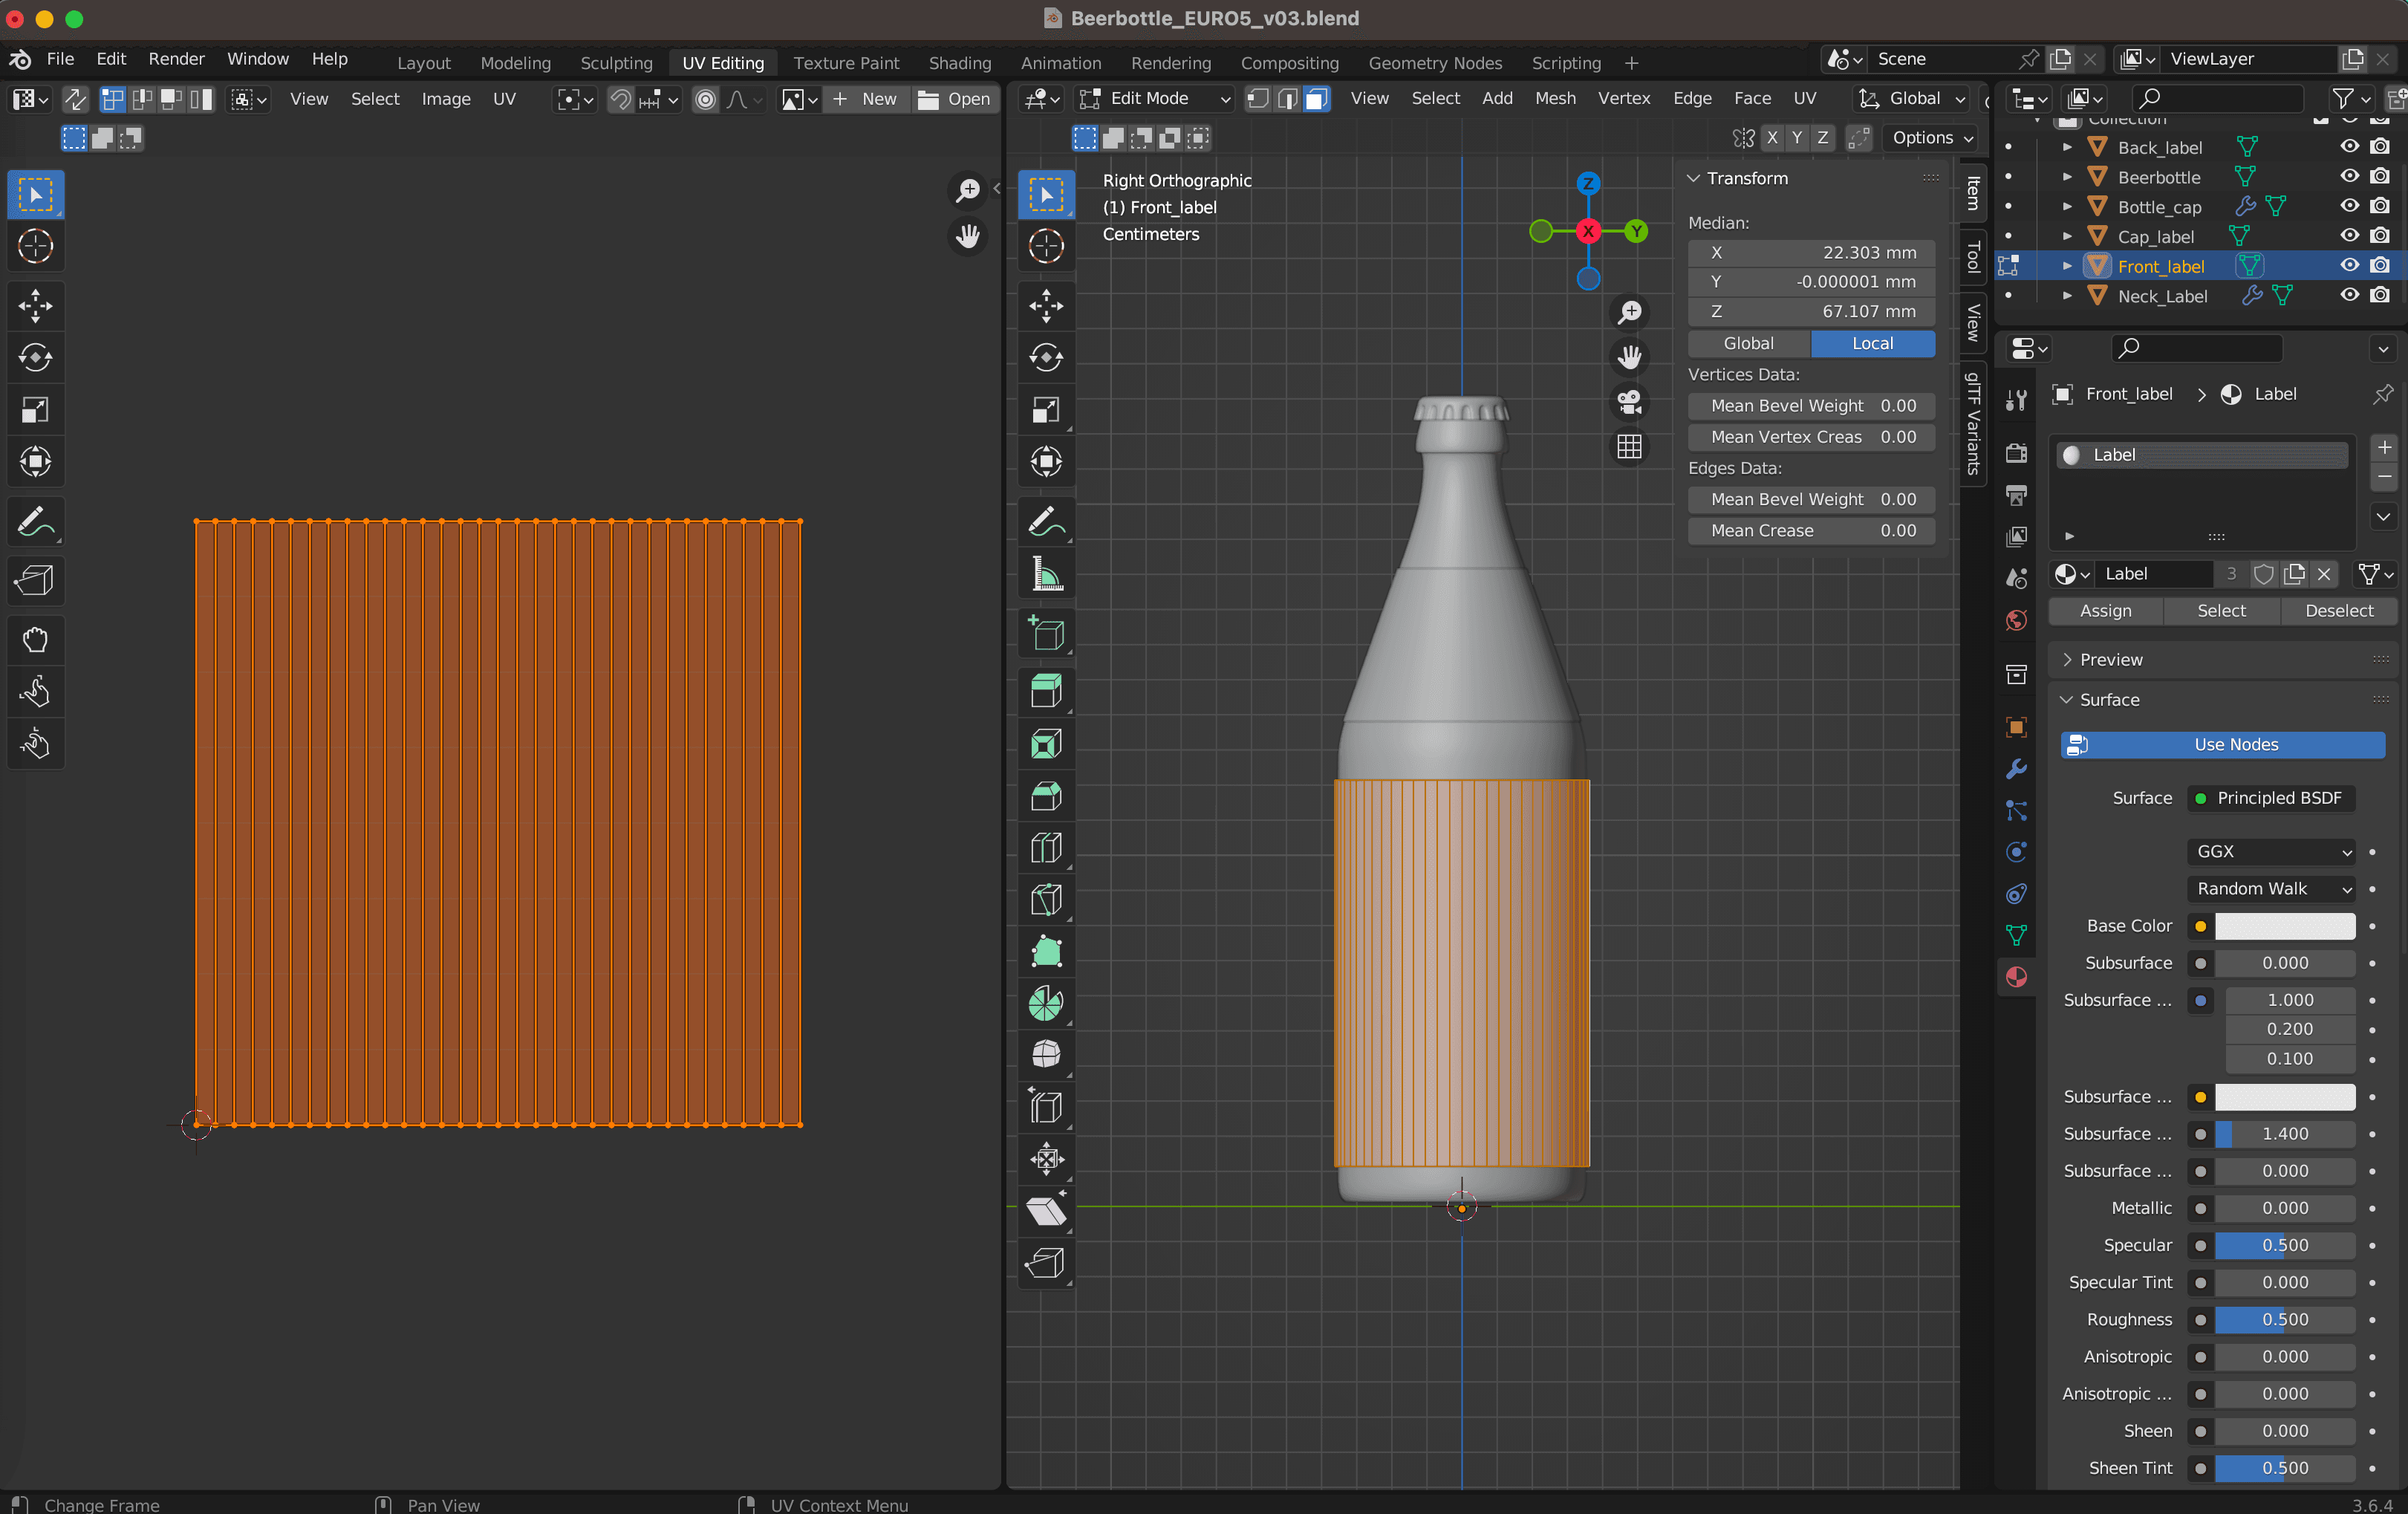
5. Create a UV Mesh
- In "UV Editing" mode (Layout > UV Editing), mark seams on the edges of the bottle.
- Unwrap the bottle into a UV mesh by pressing "U" and selecting "Unwrap."
- A UV mesh maps a 2D image (texture) onto a 3D object. Seams act as boundaries between different parts of the 3D object.
- You can further manipulate the UV mesh by moving, rotating, scaling, or pinning parts in the UV Editor window. Use tools like "Pack Islands" (Ctrl+P) or "Average Islands Scale" (Ctrl+A) for optimal results.
6. Assign Materials and Enhance
- In "Shading" mode (Layout > Shading), create a new material for your 3D object.
- Adjust the material's parameters using sliders or fields on the right side of the window. For a glass material, set the "Base Color" to white or your desired color, "Metallic" to 0, "Roughness" to 0 or a low value (< 0.1) for a smooth and shiny appearance, "Transmission" to 1 or a high value (> 0.9) for transparency, and "IOR" to a value like 1.45 to match the index of refraction for glass.
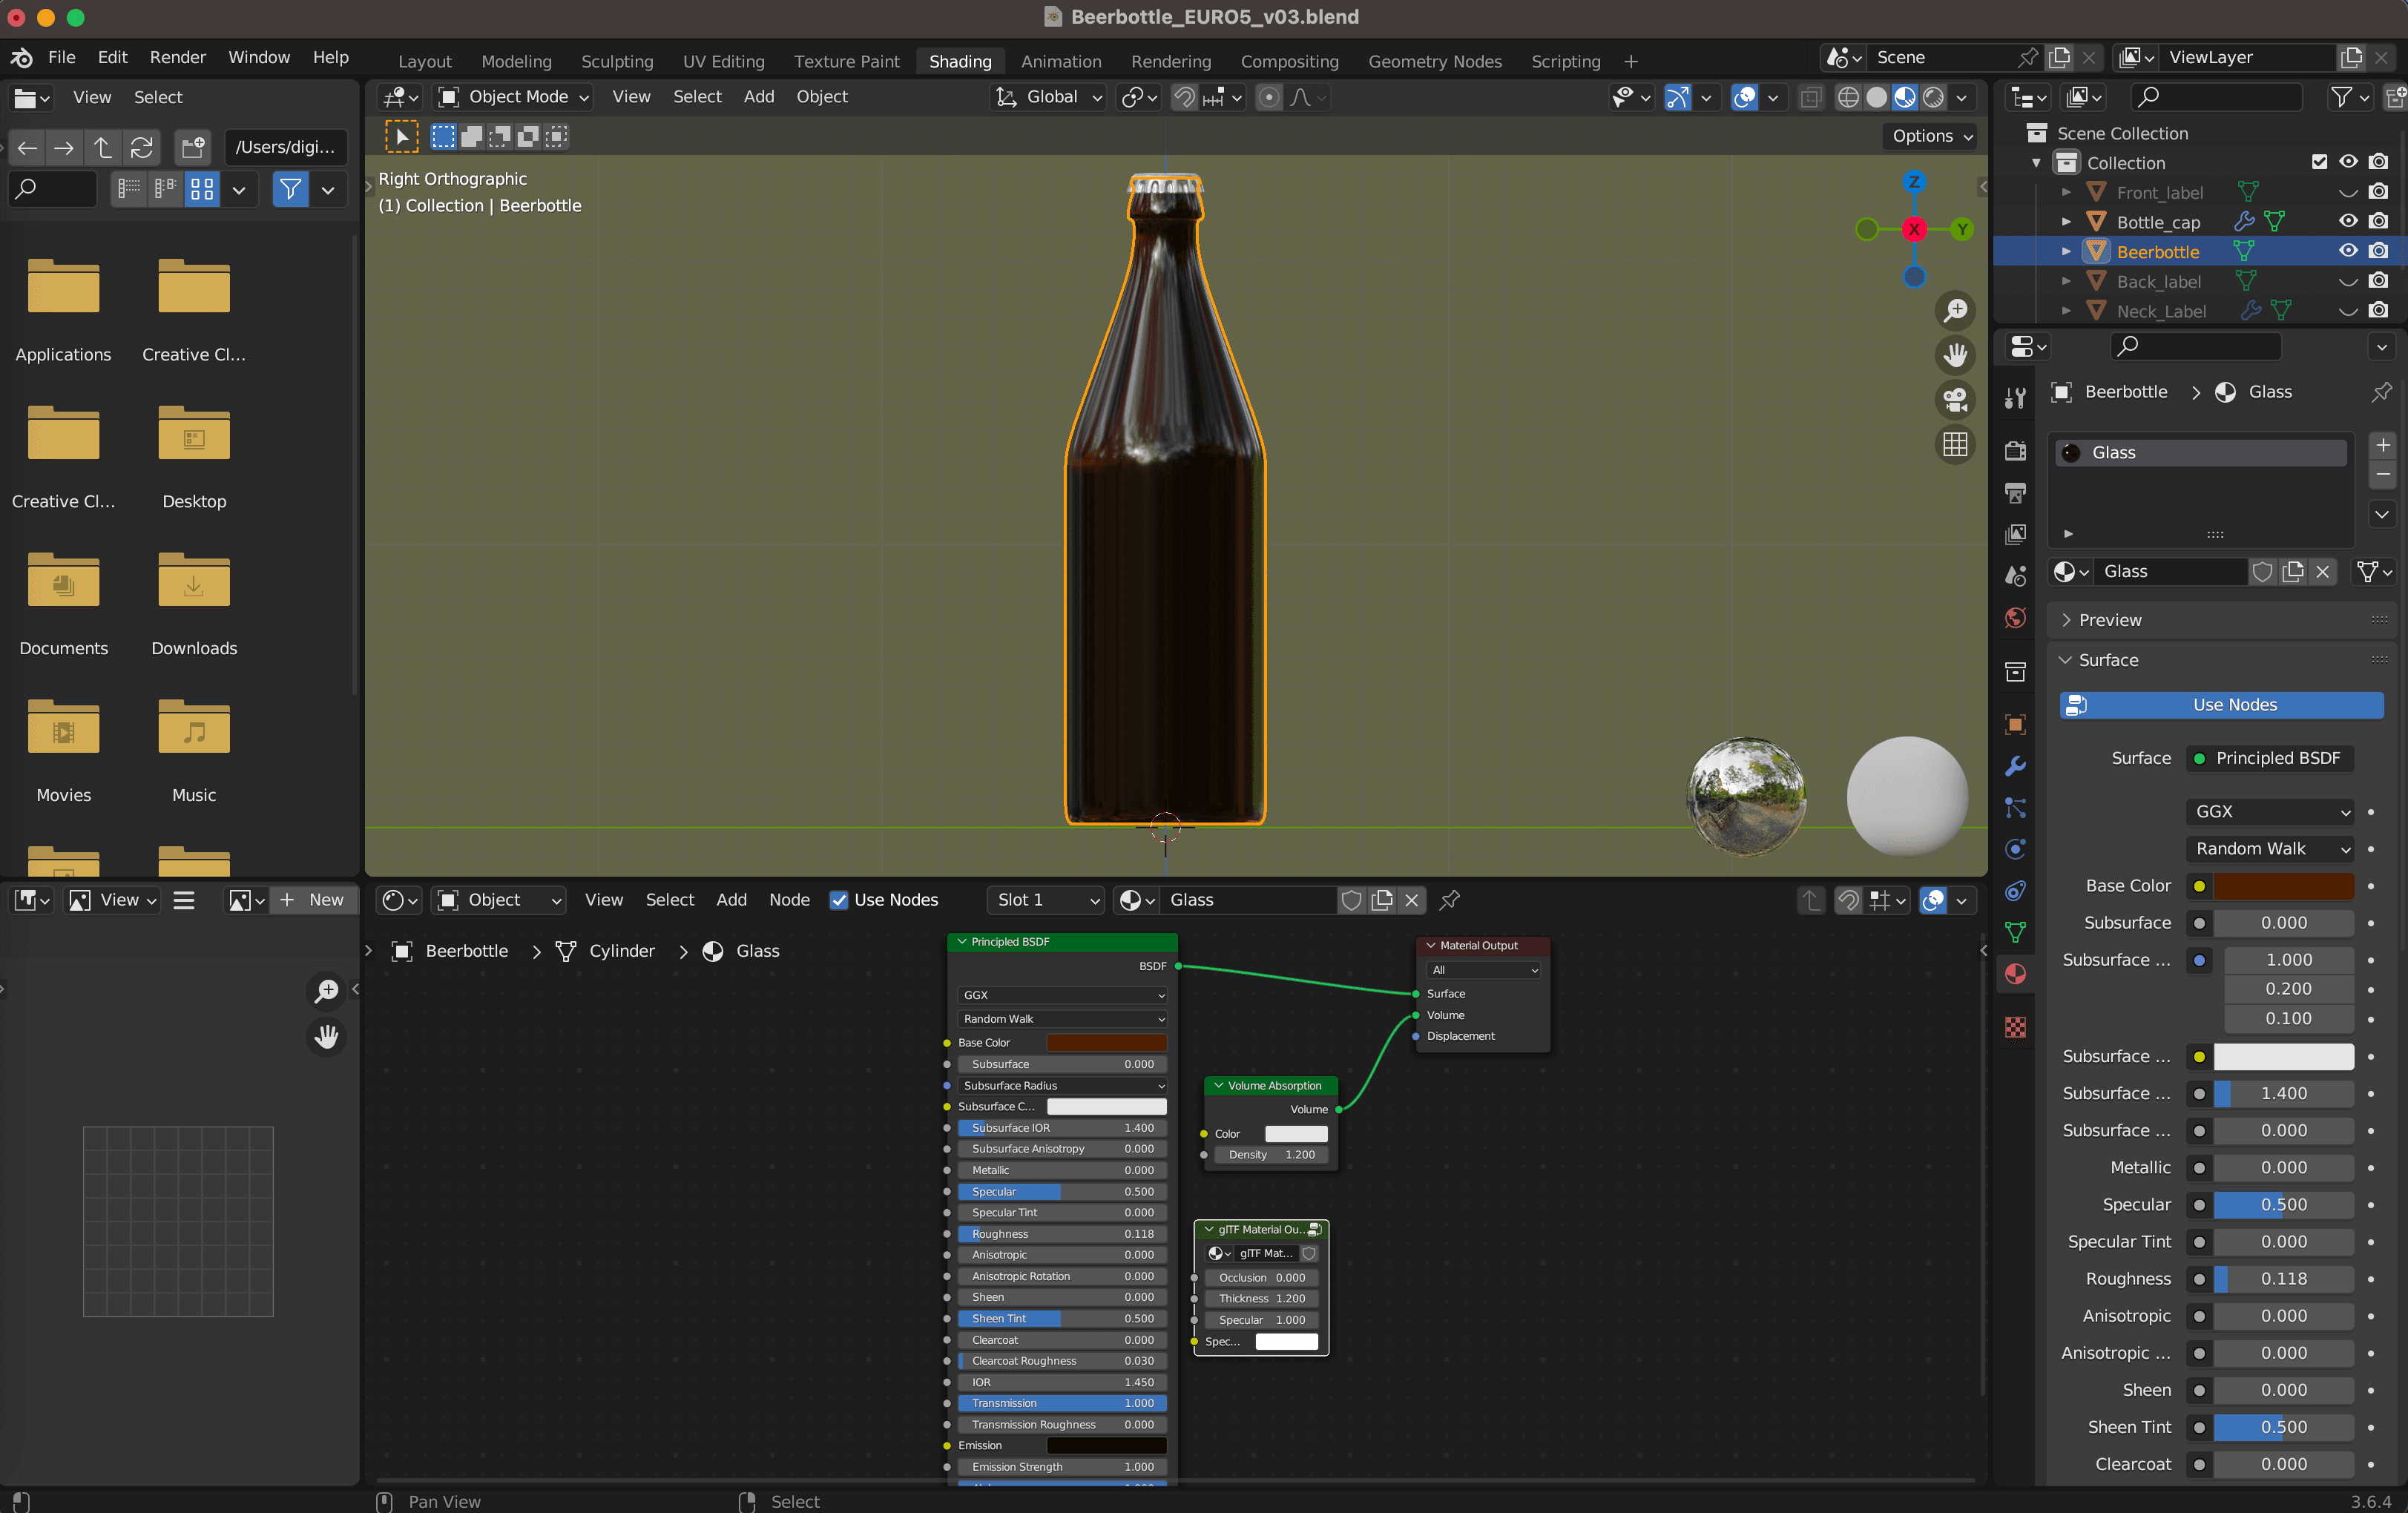
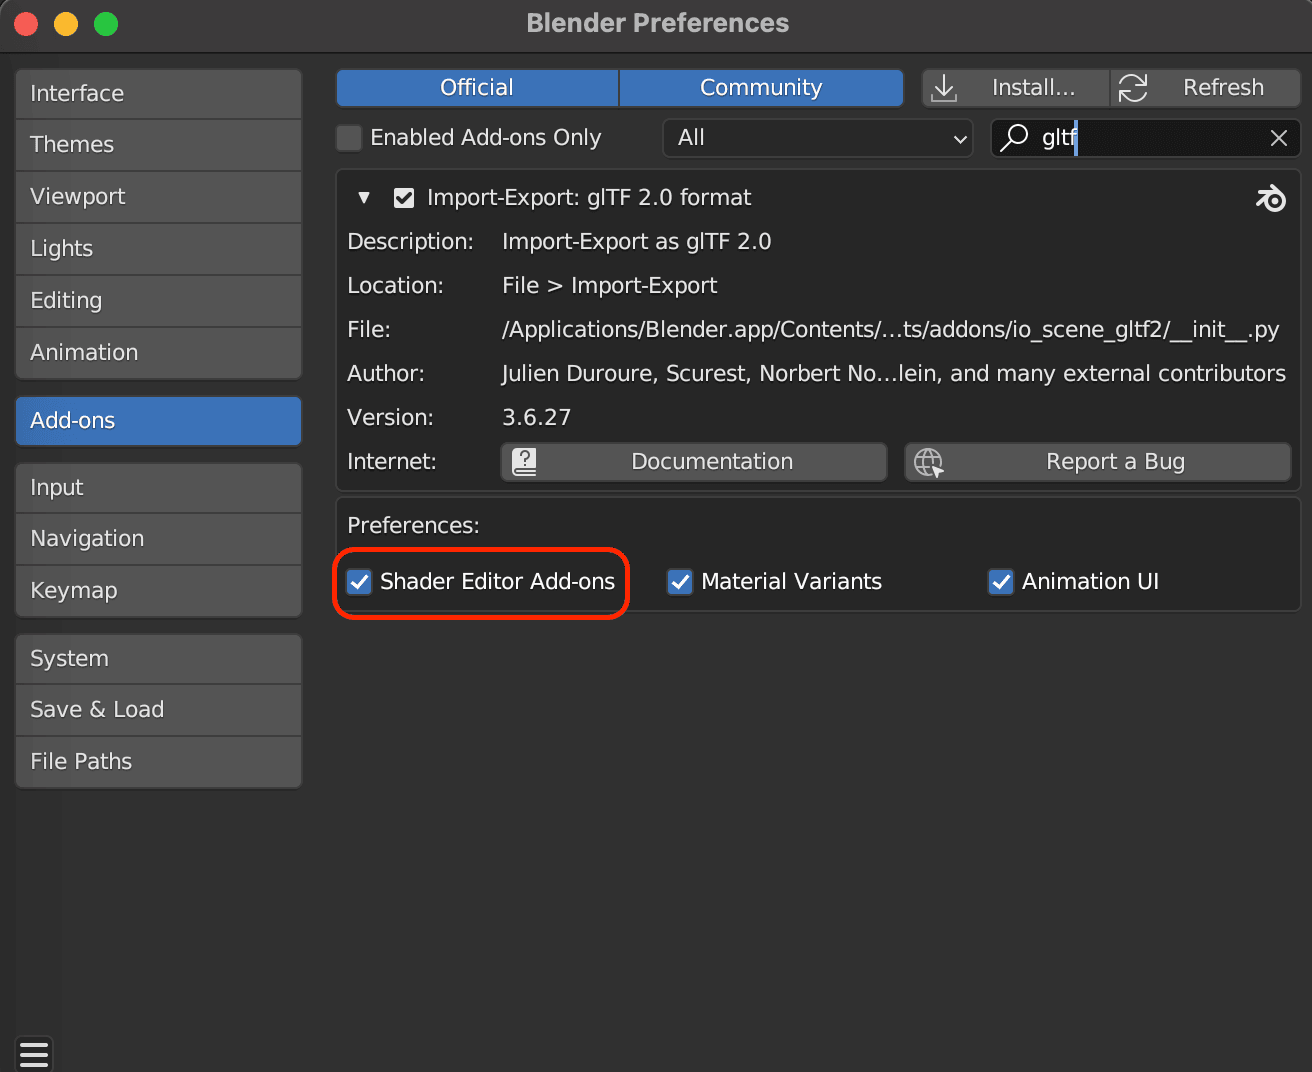
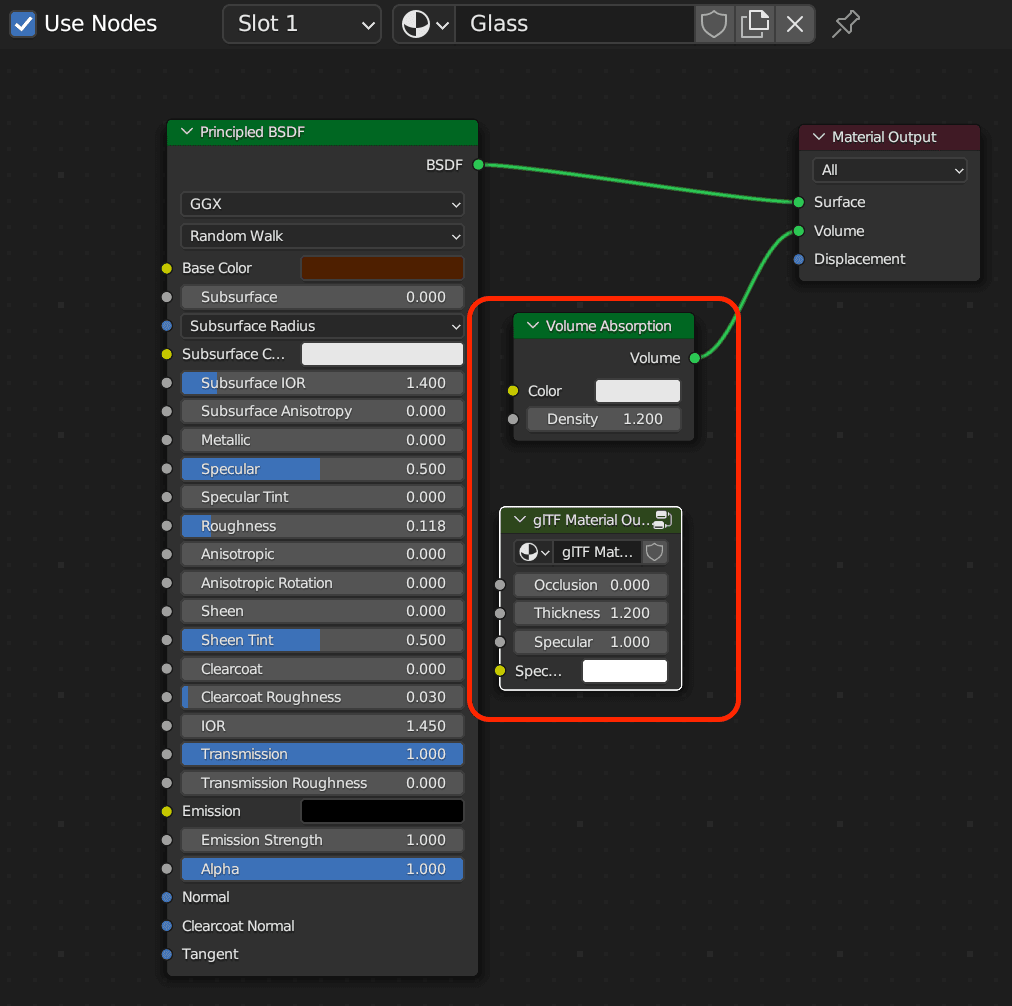
- Additionally, you can enhance your material by adding other nodes, such as a "Volume Absorption" node or a "GLTF Settings" node.
7. Export Your Object
- Go to "File" > "Export" > "glTF 2.0 (.glb/.gltf)" to export your 3D object.
- Choose a name, including selecting the binary glTF format, enabling Draco compression to reduce file size, applying modifiers if needed, and exporting PBR materials.
Uploading to DREAMCOMPOSER®
Uploading Your Object:
In DREAMCOMPOSER®, ensure you are in an active project.
On the right-hand side, click on the tab with the building blocks.
You'll find a blue "Create Shape" button in the lower right corner.
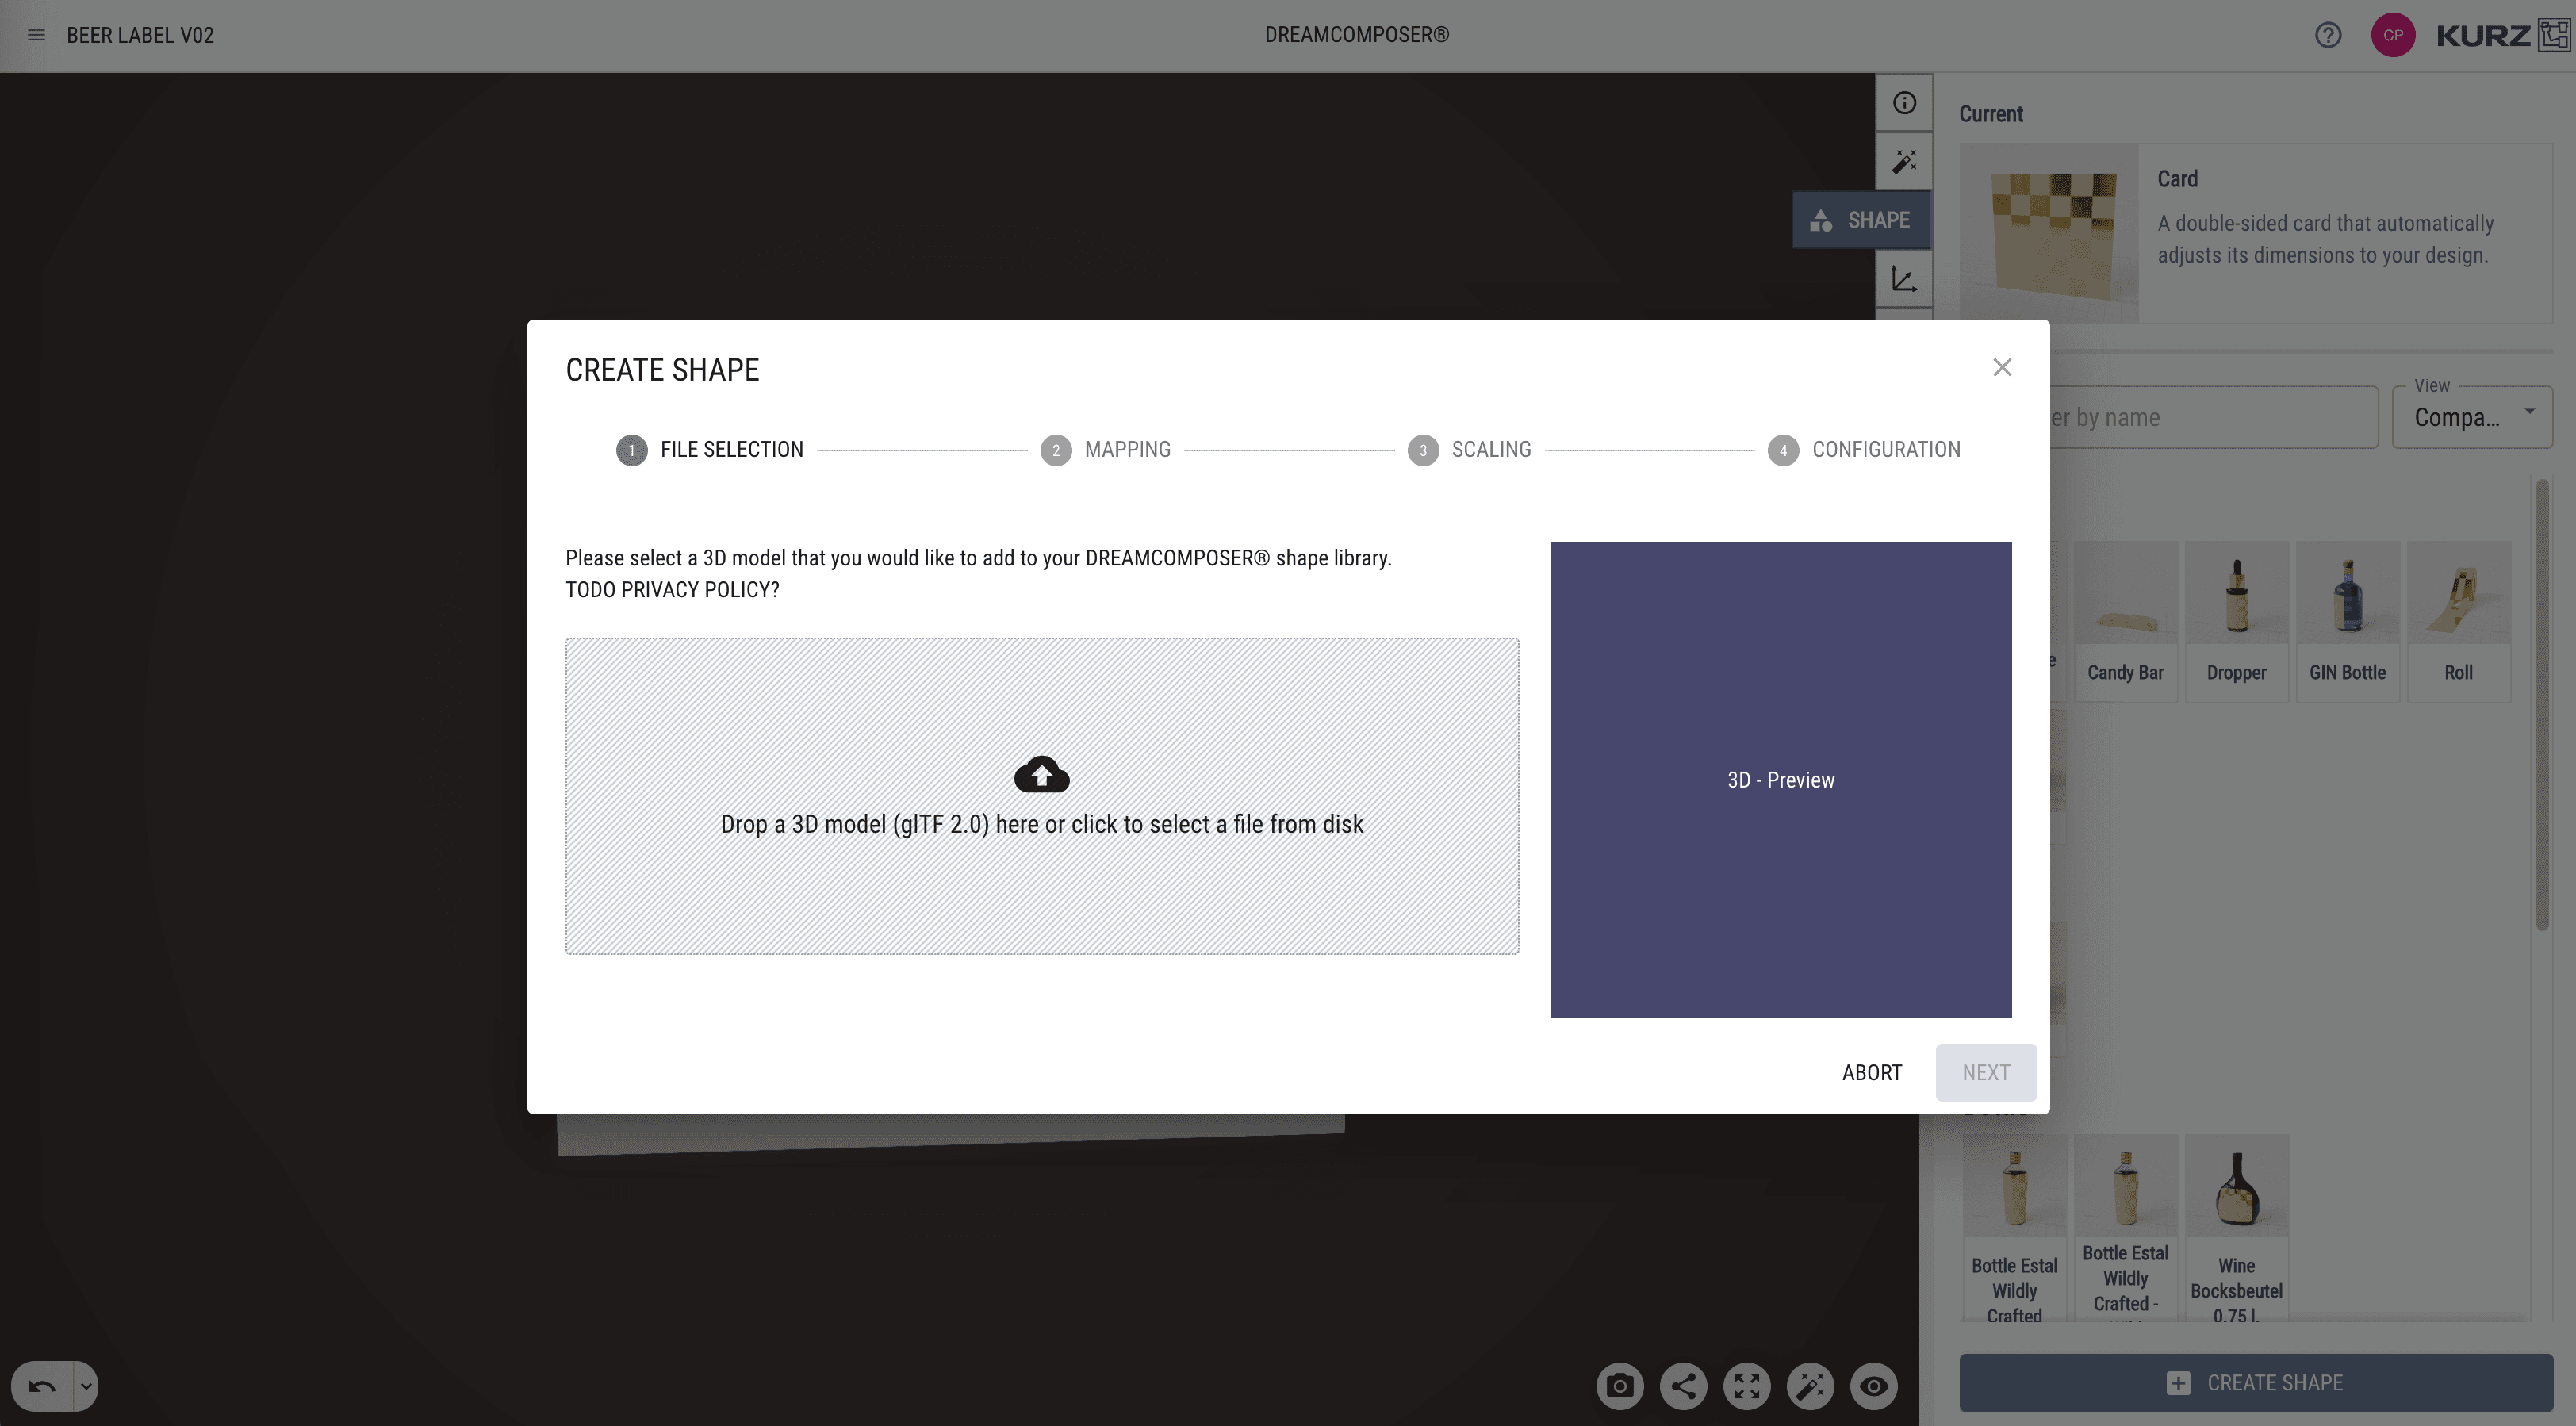
After clicking it, you will be guided through the uploading process, which includes the following stages:
File Selection: Choose your 3D model file (GLB or GLTF).
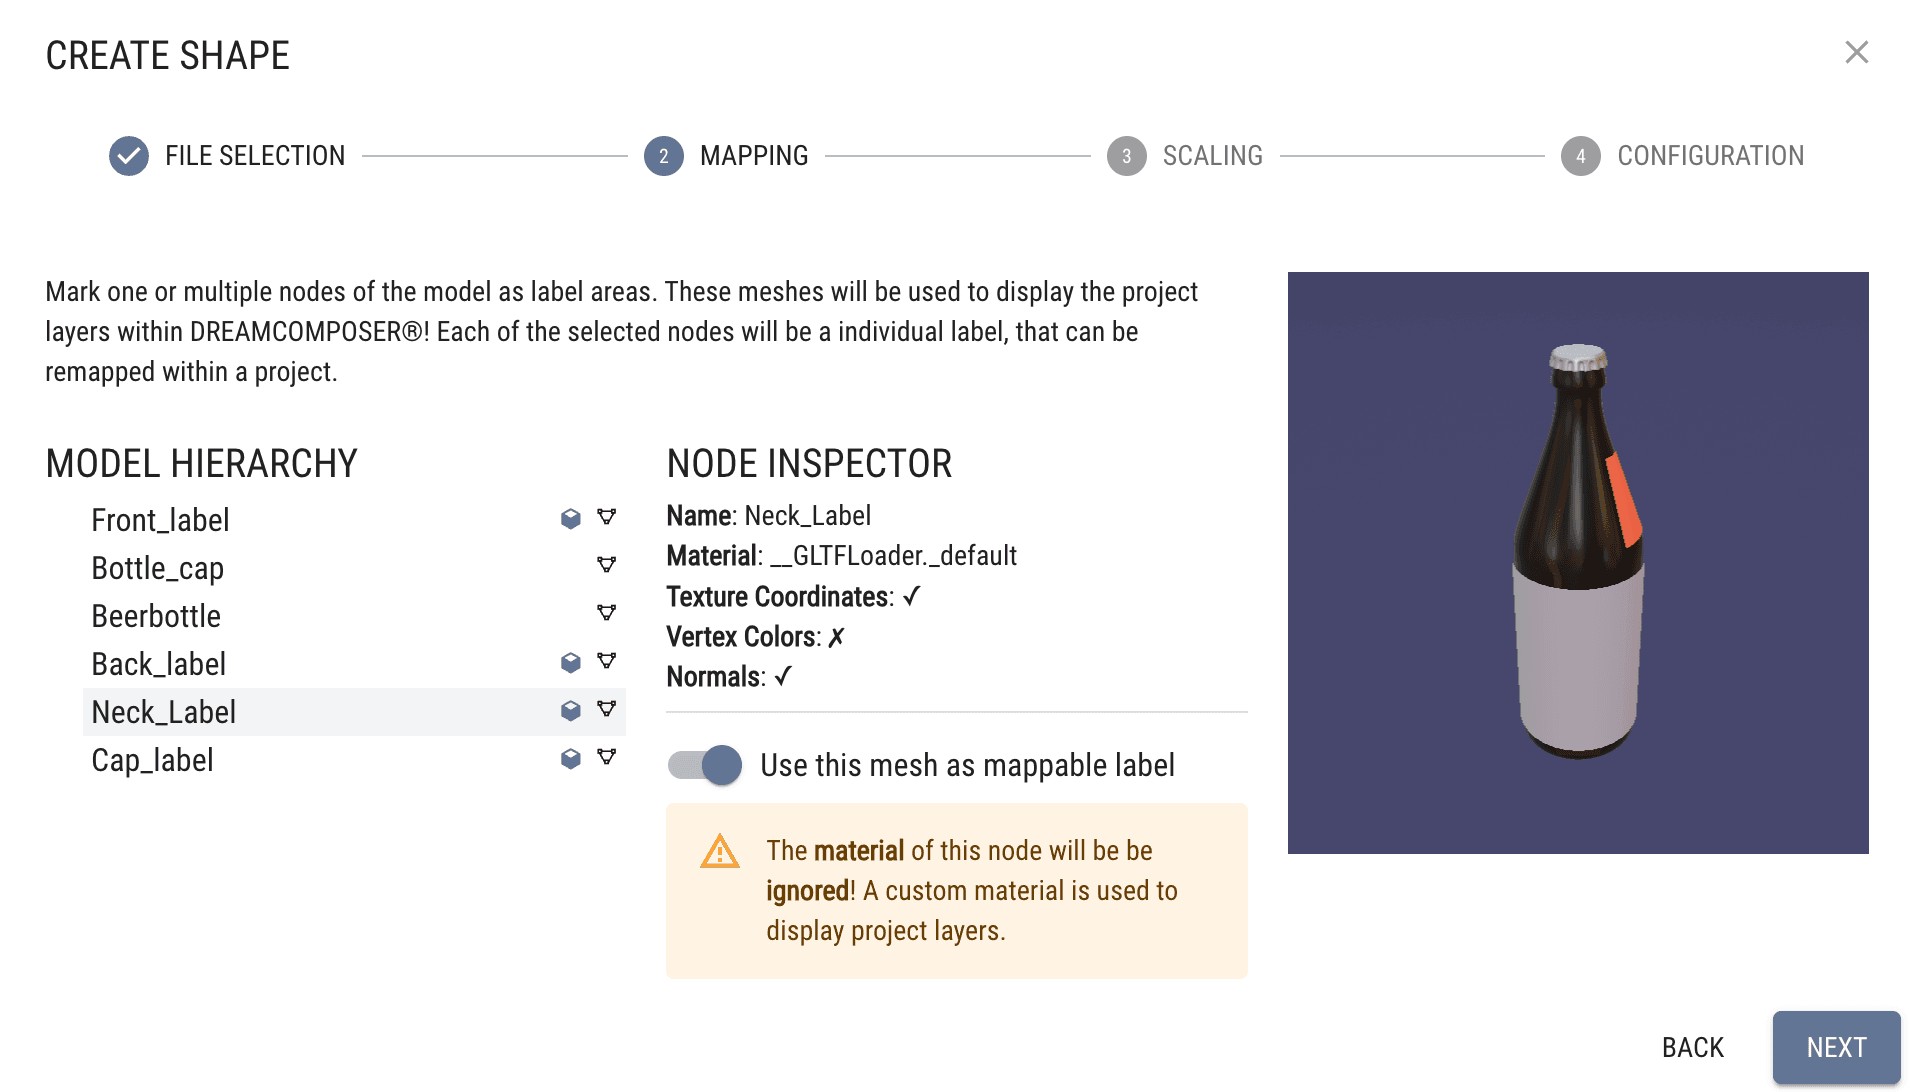
Mapping: In this stage, select one or multiple meshes of the model that will represent the mappable areas. Multi-selection is possible, offering flexibility in defining areas to be remapped within a project.
Scaling: If your 3D model's dimensions do not match your requirements, you can adjust them during the scaling phase.

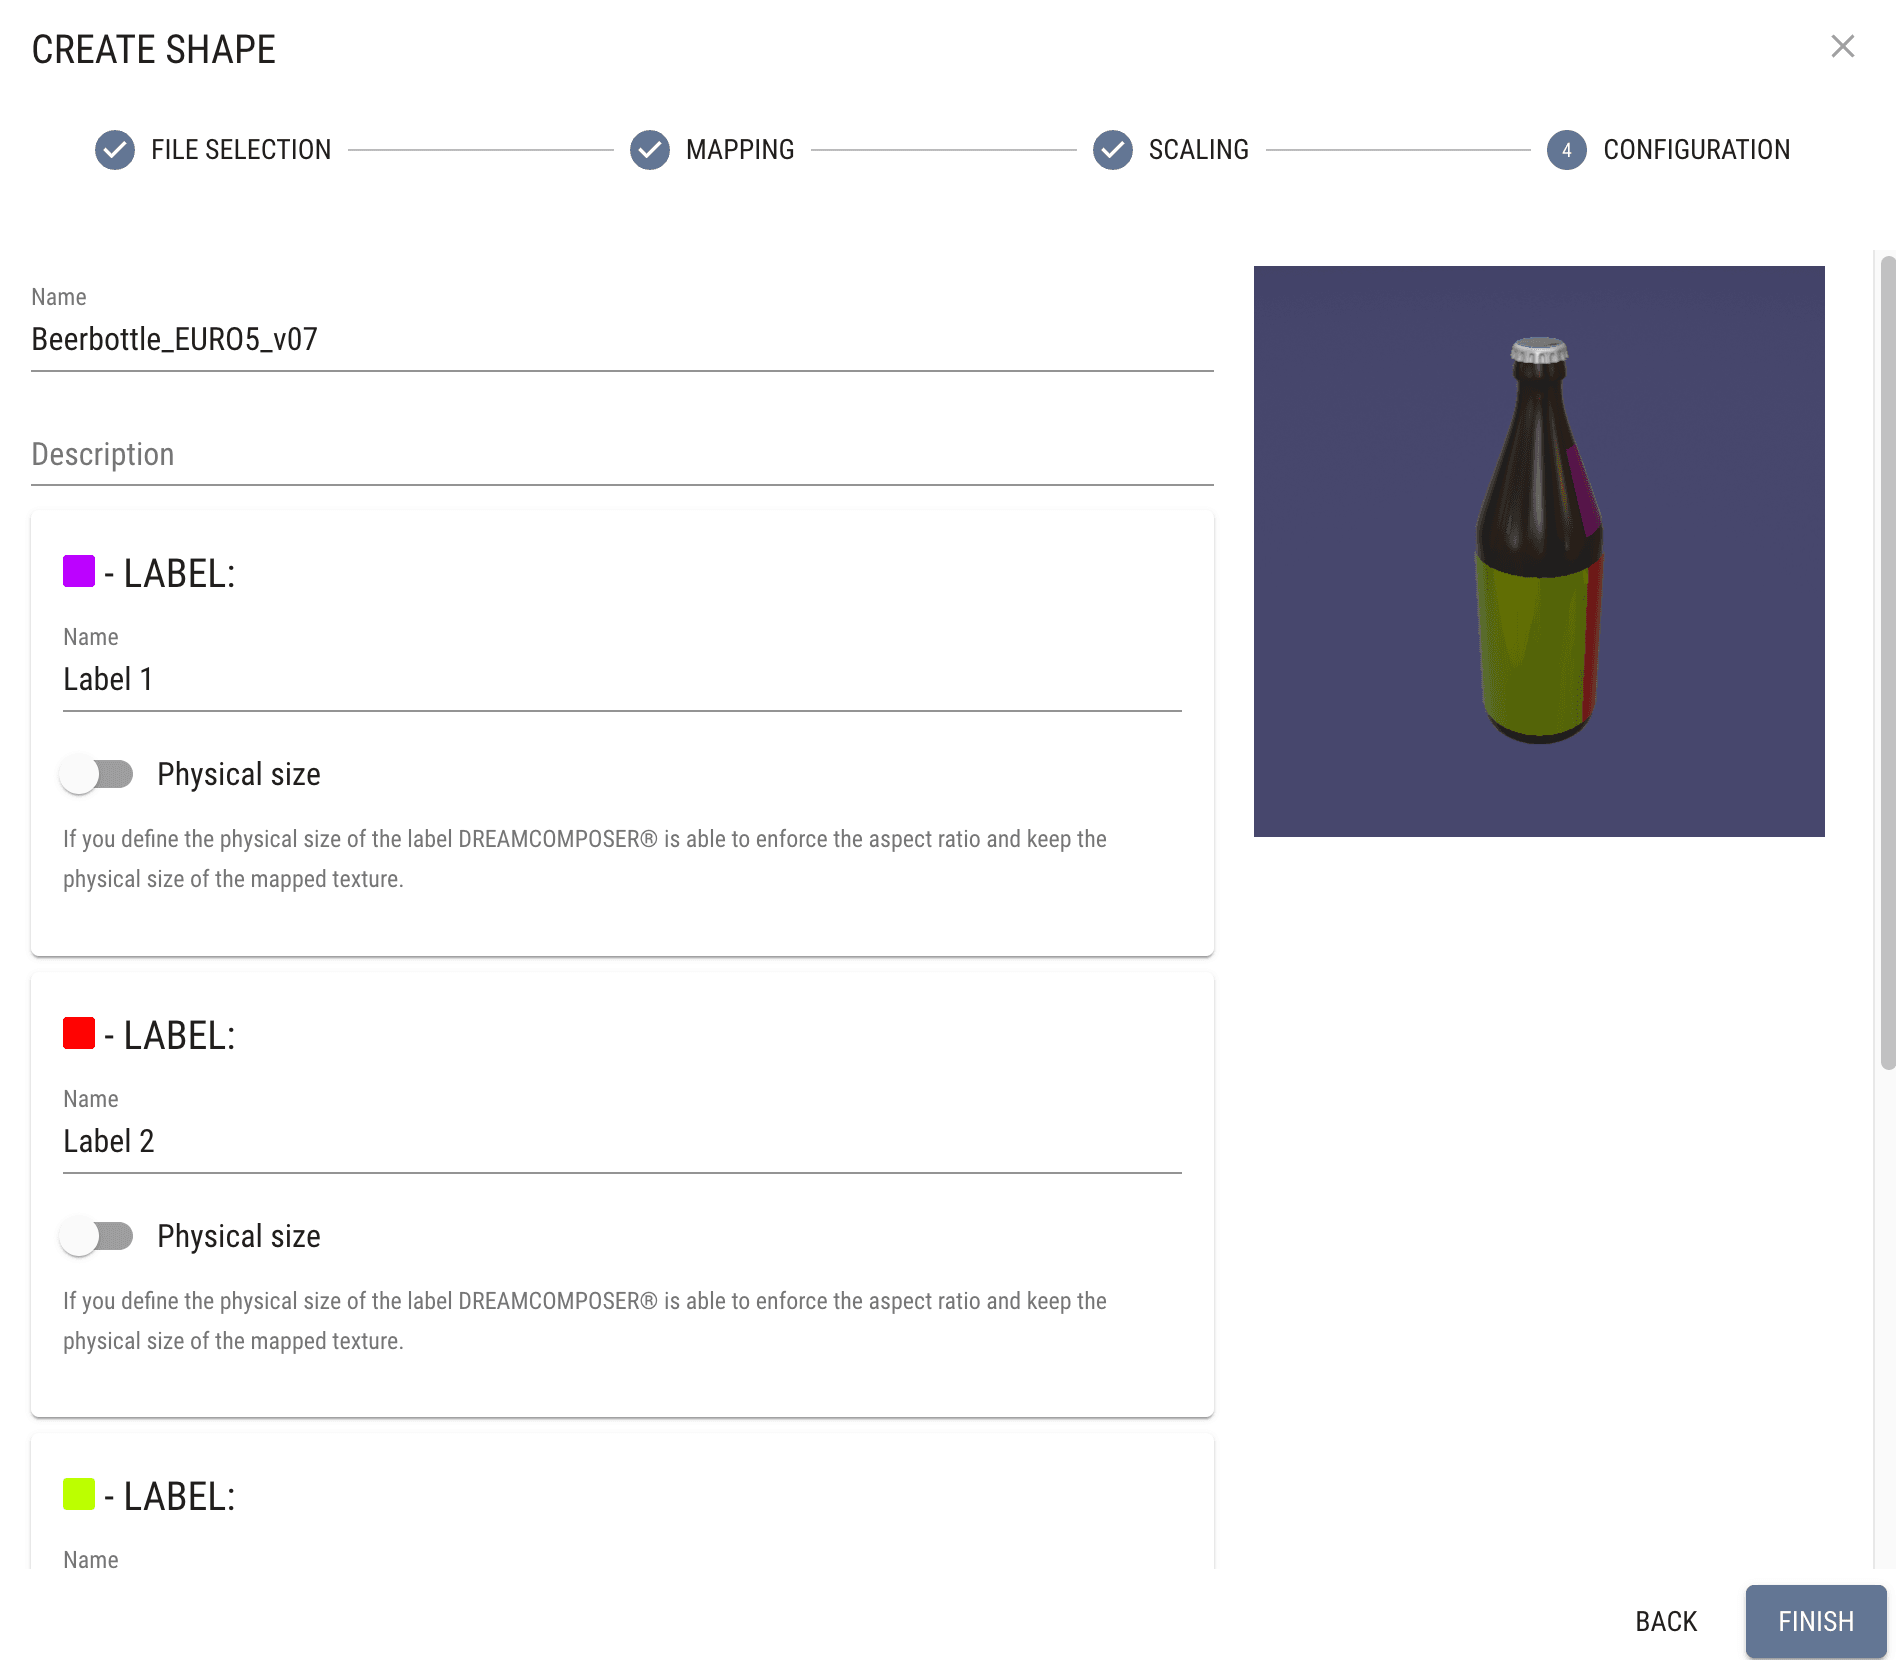
Configuration: In this step, you can:
- Provide names for the mappable areas.
- Specify real physical size dimensions for the mappable areas to ensure accurate representation in your project.
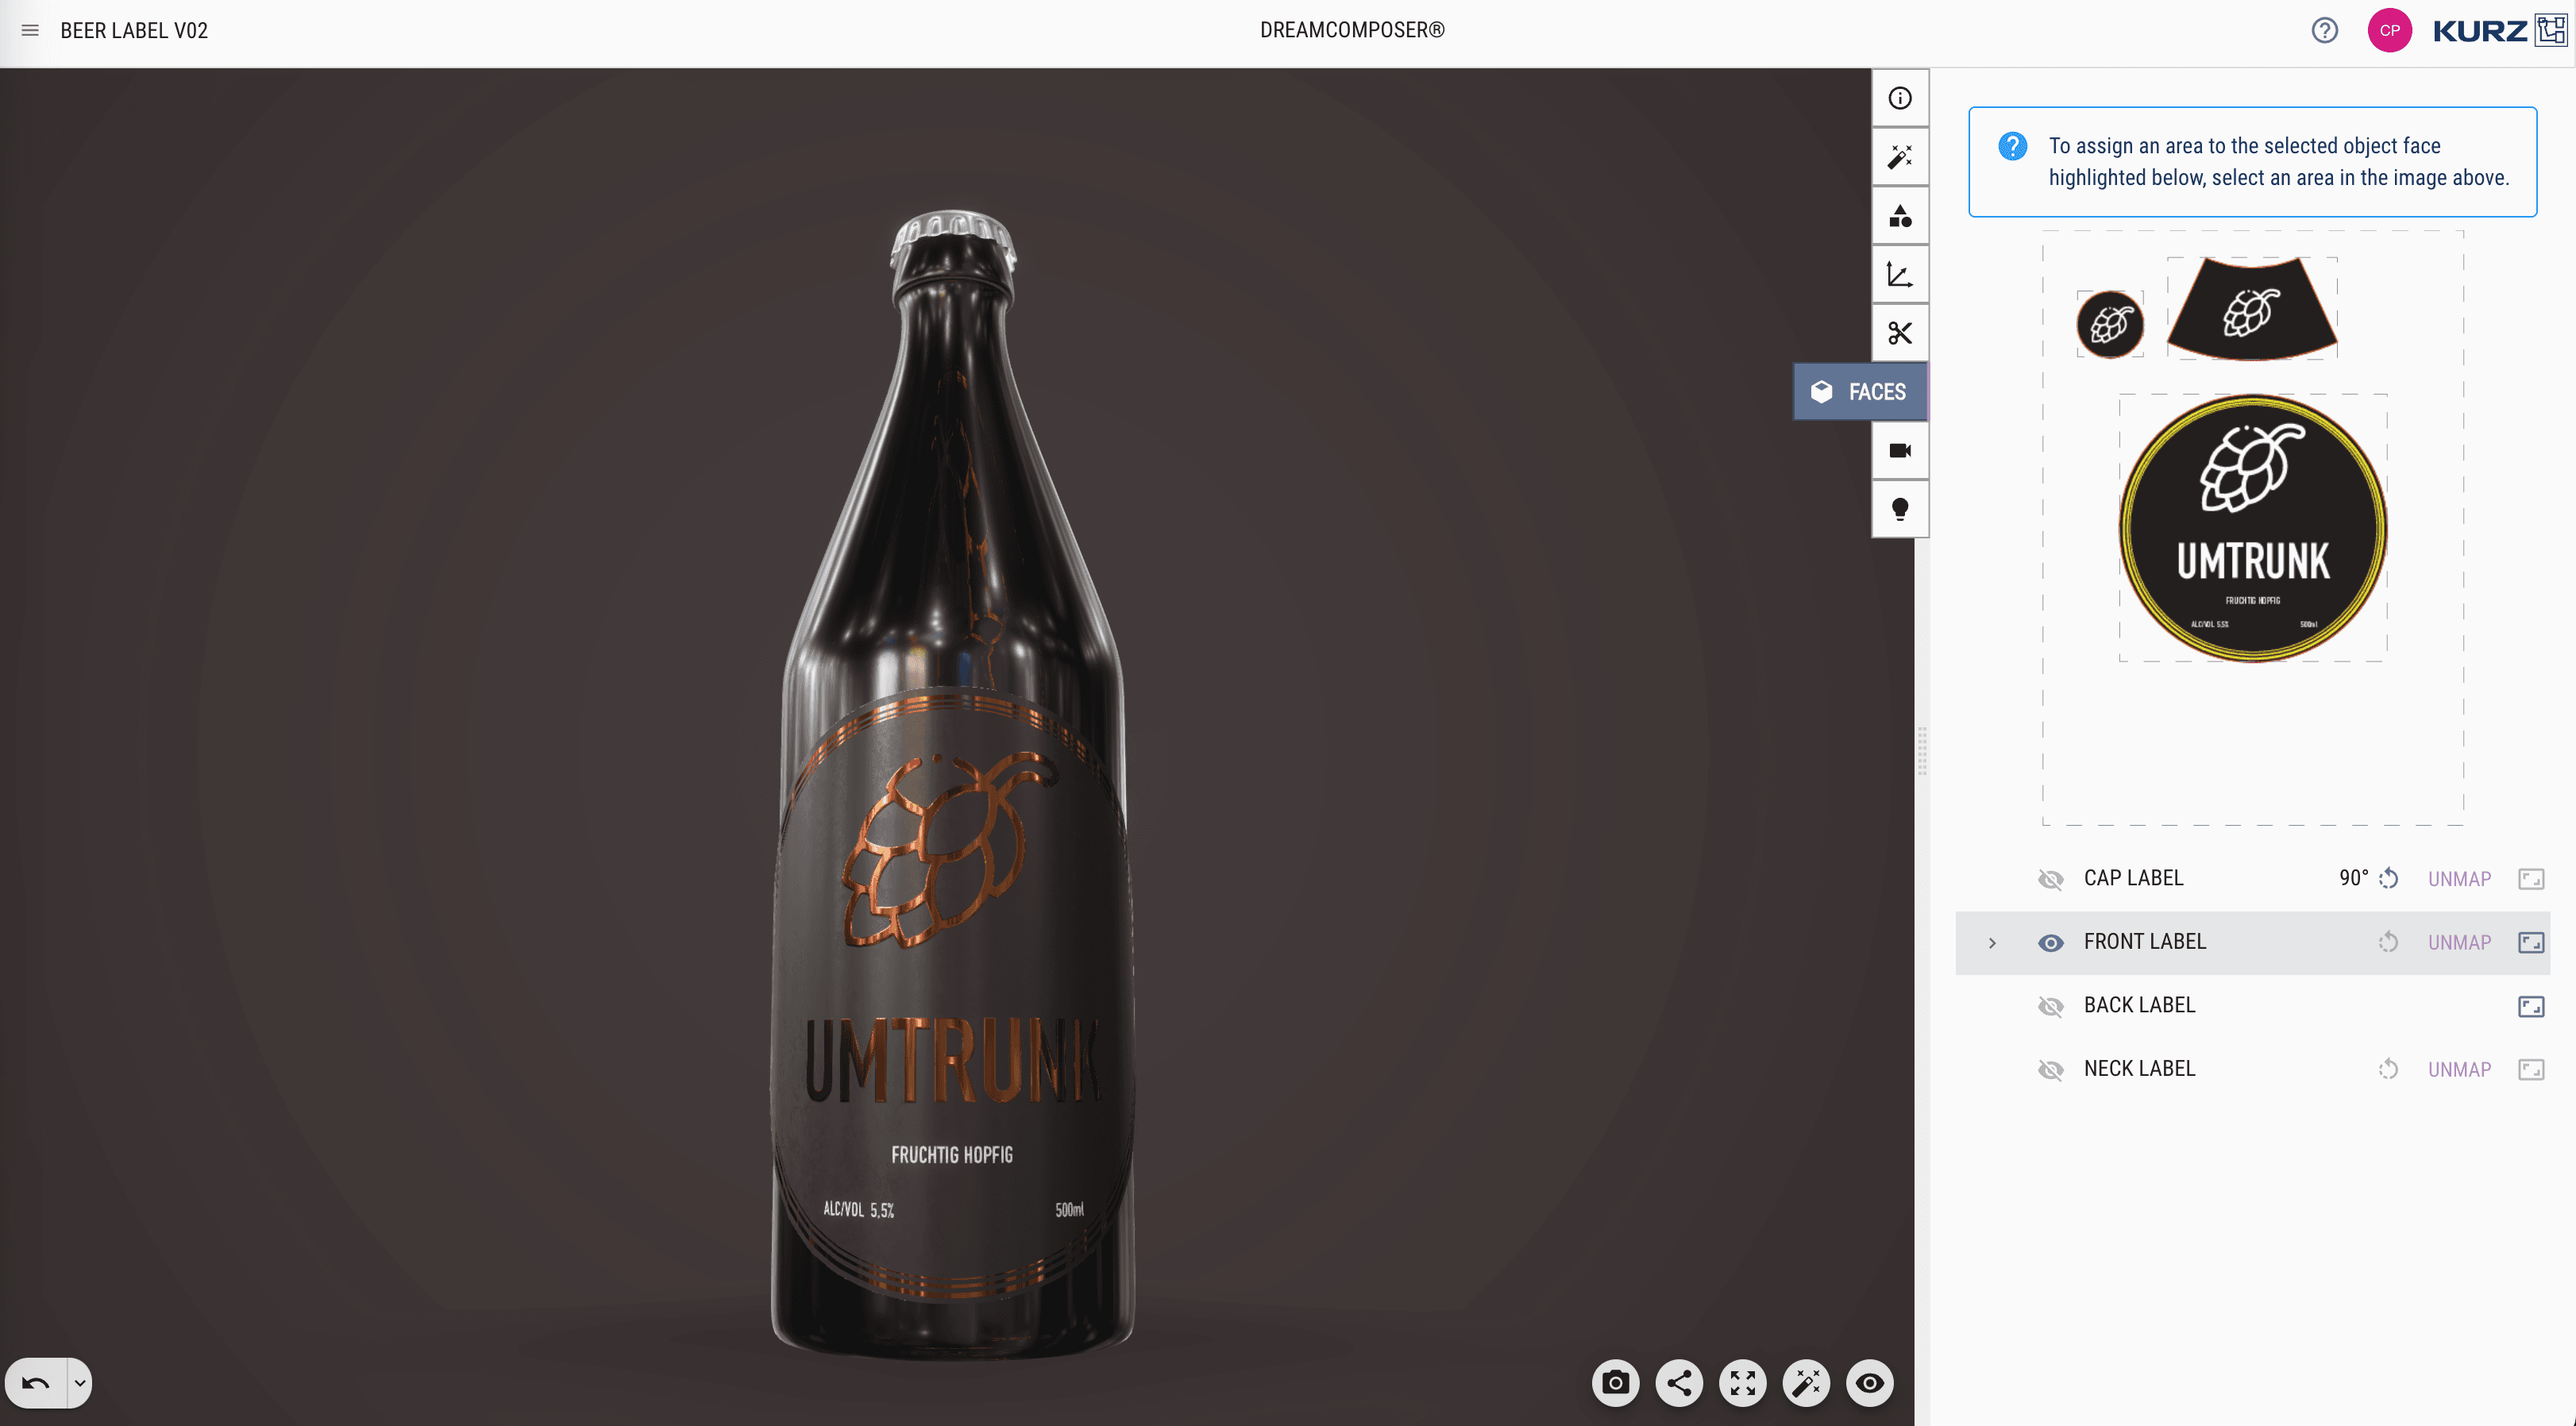
Mapping Your PDF File:
- After uploading your 3D object, you can map your PDF file and specific areas to your model.
- Click on the blinking cube icon on the right-hand tab.
- You will be prompted to select the faces of your object.
- On the far right side of each mappable area, you can scale your design accordingly.
With your 3D object and PDF file now mapped, you can proceed with creating your project in DREAMCOMPOSER®.